Bases
Bases can be built, you can find maps of private bases in boss encounters, VT cases, dungeons, Infinity dungeon mobs and daily quests.
When you buy your first base, you effectively start a new faction. You choose a faction name as part of this process. The base can be used to store items shared with your team and serves as a meeting point for members and privileged friends.
It has a workbench, but also a computer terminal to add or remove players from the faction, however, as of Season 5, these are merely decorative. You can build a functional Terminal, Workbench and even Advanced Workbench in any location you choose using the ~base command.
Faction bases will be displayed in grey on the world map. However, they change colors depending on several factors - this is explained in more detail >>below<<.
Factions are how players team up to compete in Town Control. Being in a faction is also tied to the NameColorizer feature. In addition, faction affiliation can create a perceived bond between players who have a visible identity to everyone else with Awareness. The faction name, called a "faction tag", is visible to others above the character's head, along with other Awareness-related information such as name, socketed items, and armor.
NOTE: Some resources in bases can renew, but not all. Base Brahmin do not produce more poop, and if you bring an NPC companion to the base, they will usually kill all the Brahmin there, and the Brahmin will not return. Trees may yield wood once, but they do not regrow. Flint and Broc flowers do not regrow. However, as of Season 2, Fiber Stalks generate more Fiber, and Butcher Tables yield more Meat Slices over time. No Barrels yield any Junk, and Old Computers do not yield Electronic Parts.
Contents
To buy a base
Any character of any level who is not already in a faction can start one. This can be done by buying your first base. If you are already part of a faction (such as Vault City, BoS, Enclave, Mordinos, another player's faction, etc.), you will not be able to buy a base. You must first leave your previous faction before you can start or join another faction's base. Once a character starts a faction, they automatically become its leader. Only the faction leader can buy additional bases for that faction. However, each player can build their own base if they have a map bought by another character or looted.
It is recommended that each player has their own faction, so that they can easily and conveniently add their additional characters to all of their bases at once. To do this, it is best to have a separate character who will be the leader of that faction, and the other characters will be added as Friends, so that they can see their own bases while also being members of the other faction.
DIY Bases
A Do-It-Yourself base costs: T1 10k, T2 30k, T3 50k local currency and you can choose where it should be placed on the map, but requires players to deliver materials to the location before it can be completed. You can buy it in three cities: NCR, VC or SF.
When you first buy it, you have to create a faction. To do this, you need to have at least 10k currency, check the available faction names with the ~ffn command, choose one that is free and you like it, then when talking to the NPC selling the bases, press the "Say" button and give him the name (CTRL+V works), then you can choose the base map of interest.
When you manage to create a faction in Awereness you will see its name next to your character. A tag will also appear next to your nickname - "NoTAG" by default. If you want a different tag, you should write a private message to KompreSor on Discord - in this message, specify what tag you want to have, consisting of 2-5 characters, case sensitive, the tag must be associated with the name (it can be an abbreviation of the first letters of the words of the name or a word that sounds similar), also specify the color in the RGB 255,255,255 format (do not specify the color in the hex format #FF00EE). Your tag will be assigned with the next server update.
After purchasing, a map of the base will appear in your inventory.
Go to any empty encounter on the World Map and use the map. A construction site will appear. For now, only you can see it, you can park cars there and leave things safely, but it is recommended to take everything before the construction is finished. In the middle of the location there is an NPC and a notice board - when you click on it you will see in the messagebox a list of materials that are needed to build the base and their required amount. When you bring them, drop them on the ground anywhere. When you click on the notice board you should see their current amount on the construction site. Once you have all the required materials on the ground, talk to the NPC - tell him that you want to build a base and when he asks for a name click "Say" and type the name of the base (instead of a space use the underscore character _). This name will only be visible in the terminal when setting who can see this base.
When the base is ready, only you (the leader) can still see it. Now you need to build a Terminal. For this purpose you need to have 1 Wood or 1 Junk or 1 Metal Parts. Then use the ~base command - it can be invoked in 3 ways: 1) type in the chat (the ~ sign is obtained by pressing shift+` and then space) 2) click Esc, go to the 3rd page of the menu with the arrow and press the Base button there, 3) or most conveniently - press the "=" key on the keyboard.
When the window opens, click "Login" twice, then "Faction Menu" and there "Place faction terminal". Then "Link faction to base" - this option should add the base to the faction, thanks to which you will be able to set in the Terminal who can see it - the "Manage hideouts clearance" option. Sometimes, however, this option (Link faction to base) does not work - then you should use the command "~addbasetofaction Your_Base_Name" (if you enter the name with spaces, only the first word of the name will be visible in the terminal. And if you forget to enter the name, the base will be visible as "no name", but you can recognize it by its coordinates or the order in which it was built). Then, in the terminal, set who can see it - the ranks of faction members or Friend.
- Construction Foreworker in Vault City
- Construction Foreworker in San Francisco
Once the base location has been sited, you get a yellowish location named "Building Site" on your world map:

Your new construction site will have a control terminal, and a progress billboard. You will need to gather a certain amount of resources for base construction. You can drop the items anywhere on the construction site to accomplish this. Check the progress billboard to see what is needed:

After gathering all of the required materials, you can talk to the construction worker again, and he will ask you about naming the base. The base's name is not bound in any way to the faction name. One faction might have multiple bases and each base has its own name. This is only for recognizing each base in the terminal. All of a faction's base settings can be managed from any of the faction's terminals. Once you name the base, the building site becomes a fully constructed base, and it changes in color on the worldmap from yellowish to blue. The construction worker is done there, and will then leave the base.
Note: It is recommended to avoid bringing any items to the construction site, other than the necessary resources.
When you buy additional bases with the same faction leader character, you do not need to choose another faction name as the additional bases will automatically be a part of his existing faction. Each base does, however, need to be named.
Base Management
Faction leadership needs to fully understand the management options controlled via the faction terminals. Work with a terminal and figure it all out. Most importantly, know the ranks and what they mean, know how to promote, demote, and expel a member, and how to set access to your bases. Keep an eye on the News too!
Base Access Settings
After buying a worker and after constructing a base, you need to set access to it via the Manage hideout clearance option in a faction terminal. This allows certain players to see certain bases. Sometimes a member will need to log out and back in before being able to see the base on the world map.
Note: Clearances are automatically reset when the construction site changes into a base. So you need to set them again when a base construction is complete and your new base is done.


Add a Member
You have to be the leader of the faction or an important member to add a new faction member:
- "Manage members".
- "Invite new member".
- Select "Say", and enter the name of the player you want to add. Once you have typed the name and clicked Done, they will be "Invited". "Invited" players can't see your base on the world map but can't be attacked by the mercs guarding your base either.
By default, newly invited members do not see the base yet, unless the base's access is set to "allow invited", so they might need to be escorted there by another member. They will then use the base's computer and accept the faction's invitation. Then they will be a member of your faction and will see the base on the world map.
Add a Friend
Non-members can be added to the faction database, as a Friend. This is usually done to allow someone access to a faction base in cases where they are already a member elsewhere. Non-members cannot, however, use the faction's terminal. You have to be the Leader of the faction or an Officer to add a Friend to the terminal:
- "Browse the database".
- "Create new record for non-member".
- Select "Say", and enter the name of the player you want to add. Once you have typed the name and clicked Done, a record will be created for this name. You then set the "Status" of that record to "Friend".
By default, a new Friend does not see the base. You can either set a base to "allow friends" or someone will have to bring them there. Then he will be able to see the base on the world map. Upon entering your base location, the player will receive a message in the chat window confirming that they are considered a friend at the base and can freely return to the location. If a friend is killed at the base for whatever reason, they will no longer see the base on the world map, unless the base is set to "allow friends". They might need to be brought back to the base location, but you do not need to add them as friend again.
To change the status of a record once it is entered, simply browse through the database.
Manage Hideouts Clearance
Only a faction Leader can choose base access settings per base, per member rank, to control who sees which bases. The following ranks can be set to either Allow or Disallow base access:
- Recruits: The Recruit tag is on members who accepted the invitation to join, but are not promoted yet.
- Accepted: First promotion level from Recruit, and that character gets a "Member" tag.
- Trusted: Next level up from Accepted, with "Trusted" tag.
- Important: Next level up from Trusted, with "Officer" tag.
- Invited
- Friends
So a faction could designate one base as its recruiting base, scroll to that base's record in a faction terminal under "Manage hideouts clearance", and set it to "Allow Invited". This way nobody needs to escort a newly invited member, as new invites will suddenly be able to see the base, go there and accept the invite on their own. The same thing can be done for other ranks at other bases, including Friends.
NOTE: When you use the terminal and go to "Manage hideouts clearance", remember that you're looking at a list of all the factions bases. You need to click Next or Previous to change access settings for each base.
Promote/Demote
You have to be of an higher rank than the player you want to promote/demote.
- "Manage members".
- "Promote member".
- Select "Say" and add the name of the player you want to promote.
Or :
- "Manage members".
- "Browse members list".
- Browse the list and select "promote" when you are on the right page.
NOTE: No member can be demoted back to Recruit level once he is higher than Recruit. Even a Leader cannot demote a member down to Recruit.
Setting a New Leader
To set a new leader, the actual leader has to either resign or be usurped. After a leader's resignation, the highest promoted member will have the option to accept leadership. If there are more than one player at the highest rank, then one of them is chosen randomly. In cases where a leader is usurped, it means another member has claimed leadership.
Claiming Leadership
Any member over Recruit level can Claim Leadership of the faction via any faction terminal. (Recruits cannot do this.) When someone claims leadership, a News record is added, so all members can see when someone claims leadership (if they are paying attention). If the Leader wishes to allow a member to take over as the new Leader, he need do nothing. Just wait a day or so and the claimant can become the leader, as long as the claimant is not expelled first. (Demoting the claimant does not block the claim process.) But if the Leader wishes to remain Leader, he needs to Expel the claimant via a faction terminal. The leader needs to do this soon, because the claim will mature in one day, at which point the claimant will notice a new option in the terminal, to "Confirm Claim". Once the claimant clicks that option, he immediately becomes the new leader of that faction.
NOTE: This is why a faction leader must take leadership very seriously, be diligent about promotions and watching the News. All members should watch the News in their terminals. Enemies can infiltrate a faction, earn trust, get promoted, and take over a faction and ruin it for your whole team if you're not watching.
NOTE: While the normal process to claim leadership takes one real day, a claimant can become the new leader instantly if the existing leader is killed at a faction base during an active claim. So a spy can get into your faction, get promoted once, claim leadership, wait for the leader to show up and kill him (or have him killed by someone else) and thus instantly become the new leader without having to wait for his leadership claim to mature. Be careful promoting people.
Protect Your Base
You can put some mercs or slaves in your base to defend it. They will kill any enemies entering your base (An enemy could enter your base if a faction member betrays your faction and leads them there deliberately, or if they sneak and tag on a faction member and follow them back to the base). Tell your mercs or slaves to guard the base, and to shoot at anyone who isn't a member of your faction.
News
All members should check the News records in a faction terminal to see who is joining, who is leaving, who is promoted, etc. The News will also show you when someone is trying to take over your faction and become the new Leader.
Character Database
A faction's terminal has a database that members can use to keep track of other characters. Members can add any in-game character name to their faction terminal database, and include that character's faction name. This includes the names of known enemies or even random characters you meet along your journey. Then with a radio tuned to your faction's radio channel, use the order recognition command to do a quick look-up about that character, and get some quick reminder about them and their faction.
Bases
The Cave Base

The Cave, really easy to defend but a bit small. It is divided into two parts: the cliff side with a cave entrance on an empty desert map, and inside of the cave itself. It contains the usual crafting tools (Workbench, still), a brahmin pen and only 3 lockers. It's not a cost effective base since Depot has more containers and is sold at the same price, but the cave does has one advantage: it's very easy to defend because you just have to put mercs or slaves in front of the tiny cave entrance. The cave is the only base you can purchase from all three of the base sellers. Because of this, the Cave is one of the most varied bases around as it can be purchased almost anywhere for a measly 33k caps.
The Depot Base

- Cost: 30k caps for pre-built Depot
- DIY Option: Yes
- Towns: Klamath
Depot is a small outpost, with 3 lockers, 2 desks (one looks like a workbench), 2 shelves, and 2 table. 9 containers total when you consider it also has a workbench with the standard toolboard for small storage above it and a still. There's also a brahmin pen containing one brahmin. On the map, you can find wood and flint (does not replenish). It's a good and cheap base, and the spawn is straight below the door and chairs outside. Guards can be placed to the far right of the spawn, near the trees. They will have the small spawn area directly in their sight. Base locations seem to typically be somewhere to the West of Klamath. The Depot is sold in Klamath, and is the same price as the Cave, yet offers considerably more in terms of storage space. Depot can be purchased from the base seller Smiley in Klamath. He is located in the bar and hotel at the Main entrance.
The Scrapheap Base

- Cost: 70k caps for pre-built Scrapheap
- DIY Option: Yes
- Towns: Redding
Scrapheap is a popular base costing 70 000 caps. It is larger than Depot or Cave. Its location is often between Redding and Broken Hills. It contains 5 lockers, a workbench, a still and a brahmin pen. The Scrapheap offers a low amount of resources when compared to other bases, with the Cave being on similar grounds yet having a bigger brahmin pen and more brahmin than both Depot and Cave. Scrapheap is Redding's specialty base. It is sold from the Redding base seller who is located in the Malamute Saloon, which is above the Doctors building.
The Outpost Base

- Cost: 130k caps for pre-built Outpost
- DIY Option: Yes
- Towns: Junktown
A pre-built outpost is the most expensive base, second only to the bunker. It is very easy to defend because it is surrounded by walls, and has three buildings plus two tents, and is probably the most popular base amongst most players. Its location on the world map will often be between NCR and Junktown. It has 10 containers, a workbench, a still, a water pipe, a well, fibers plants, and a larger brahmin pen with more brahmins than other bases. New characters can shovel more poo in peace. It's a large map with plenty of space on the ground to lay out rows of important items. The Outpost base is the speciality base sold from the Junktown base seller, who is located in the very first building after entering Junktown via the south gate.
Trapper Camp Base

- Cost: 50k caps for pre-built Trapper Camp
- DIY Option: Yes
- Towns: Klamath
- Car parking slots: 10
Gas Station Camp Base

- Cost: 50k caps for pre-built Gas Station Camp
- DIY Option: No
- Towns: Redding
Old Bunker Base


- Cost: 350k caps, base available via Abandoned Bunker quest
- DIY Option: No
- Towns: Unknown, base available via Abandoned Bunker quest
The bunker is by far the most expensive base. While the outside part of the map is very difficult to defend, an enemy will have a very difficult time getting to the inside of a well-guarded bunker. It has fifteen lockers, a crate near its still, two computers that contain electronic parts, four private rooms in the back with showers, a waterpipe, a broken Mr Handy robot, a broken elevator, and wall safes that are often overlooked. The room with four lockers is locked with a yellow pass key, making it safer to store your valuables in the event of a raid, for a total of 23 storage containers plus a workbench. It houses a large conference room with a big-screen video display toward the back for those important meetings. Besides its massive amount of storage space, the mouth of the bunker opens into a small mine with iron ore and minerals, making this by far the best base money can buy. Oddly enough, the base has no brahmin pen.
Private Bases Maps
Private Bases maps can be found from sources in the Loot Drop table. Tiers 1-3 can be bought from the construction managers
Bases maps are splitted into 6 tiers:
- Tier I:
Tents, Caves, Ruins - Tier II:
Safehouse, Small shelter, Small bunker - Tier III:
Depot, Outpost, Storage, Scrapheap, Trapper camp, Library, Cabin, Church, Blades HQ, Khans HQ, Gas station, Caves HQ, Nuka Cola Outpost, Parking, Basement - Tier IV:
Bunker and Patreonbases(tier 3) - Tier V:
Patreon bases(tier 4) - Tier VI:
Base with T4 machinery or map to interplay
Private Bases Guide: https://www.youtube.com/watch?v=MB51i8ESe6I
Base Color on Worldmap
Bases changing color on worldmap depends:
- Inside there is a Player = Pink
- Inside there is a Companion = Yellow
- Inside there is a Car = Cyan
- Inside there is a Car and Companion = Orange
- Inside there is a Car and Player = Purple
- Inside there is a Companion and Player = Blue
- Inside there is a Companion and Player and Car = black
- Inside its nothing = Gray
Base Tiers
Tier 1
All these bases only have 1 parking spot, and can be crafted
- Tent - craft Folded Tent
- Cave - craft Hollowmaker tools
- Ruins hideout -craft Patch Kit
- Workshop - craft Scrapshaper Kit
- Station - craft Trackshaper tool
- T1 Bases Gallery

Tent

Cave

Ruins hideout

Workshop


Tier 2
- Safe house
- Small bunker
- Small shelter - 3 parking spots in front of the house
- Verdant Hollow
- Steelveil tunnel
- T2 Bases Gallery

Safe house

Small bunker

Small shelter

Verdant Hollow

Steelveil Tunnel


Tier 3
- Library
- Small cabin
- Church
- Basement
- Nuka Cola outpost
- Storage
- Parking
- Trapper camp
- Gas station
- Depot
- Outpost
- Cave HQ
- Scrapheap Base
- Blades HQ
- Khans HQ
- Camp HQ
- Temple
- Hazmat Den
- T3 Bases Gallery
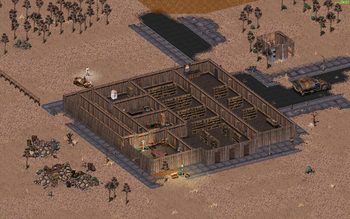
Library

Small Cabin
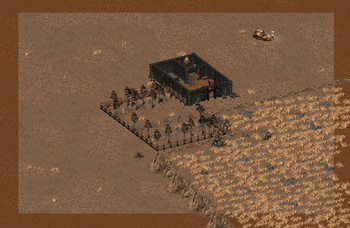
Church

Basement

Nuka Cola outpost
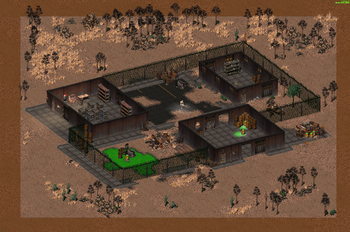
Storage

Trapper Camp

Gas Station

Depot

Outpost

Cave HQ Inside

Cave HQ Outside

Scrapheap Base

Blades HQ

Khans HQ

Temple

Hazmat Den


Tier 4
- Enclave bunker
- Brotherhood of Steel bunker
- Vault City Outpost
- Vault
- NCR port
- Casino
- Old Bunker
- Ruined Jail
- Cathedral
- Trackside Nexus
- T4 Bases Gallery

Enclave bunker

Brotherhood of Steel bunker

Vault City Outpost

Vault
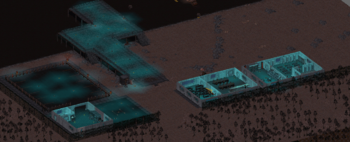
NCR port

Casino

Old Bunker Inside

Old Bunker Outside

Ruined Jail

Cathedral

Trackside Nexus


Tier 5
- Military Base
- Enclave Depot
- President shelter
- NCR bunker
- Homeland
- Underground station
- Military Depot
- Advanced outpost
- Slavery base
- Underground station MK.II
- Brotherhood of Steel outpost
- Cave labs
- Large church
- Garrison
- Glacierwatch base
- T5 Bases Gallery
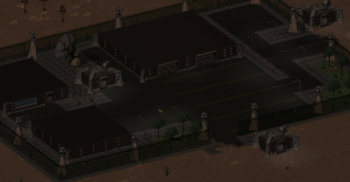
Military Base (New World Military Base)
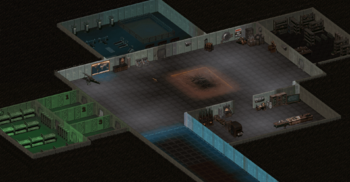
Enclave Depot

President shelter

NCR bunker

Homeland

Underground station

Military Depot

Advanced outpost

Slavery base (Mesa Negra labour camp)

Underground station MK.II (Bunker Delta)

Brotherhood of Steel outpost

Large church

Garrison
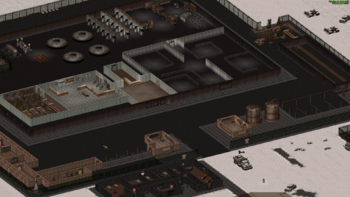
Glacierwatch


Tier 6
- Semi High Tech Cave
- T6 Bases Gallery

Semi High-tech Cave (Cave labs)

Base Rape
- Base rape is a term used to describe leading unknown or untrustworthy person to a base who after gaining access empties it out for personal gain.
Interior decoration
In every base you have access to (you can see its location on the world map) you can build and destroy workbenches, containers and decorations.
On containers and doors you can put Lock or Fingerlock, such an object cannot be destroyed until the lock is broken.
Workbenches
1. Workbench, cost:
- 50x Metal Parts
2. Advanced Workbench, cost:
- 30x High Quality Alloys
- 30x Electronic Parts
- 30x Fire Gecko Pelt
3. Remove ALL workbenches
Containers
Each container costs 1 Wood or 1 Junk or 1 Metal Parts.
After built, you can choose whether or not you can walk through the object, and whether or not you can shoot through it.
Use Engineering skill to delete container.

1. Fridge
2. Ice box(L)
3. Ice box(R)
4. Footlocker(L)
5. Footlocker(R)
6. Rusty Footlocker(L)
7. Rusty Footlocker(R)
8. Locker(L)
9. Locker(R)
10. Rusty Locker(L)
11. Rusty Locker(R)
12. Wooden Crate
13. Wooden Chest
14. Bookcase(L)
15. Bookcase(R)
16. Large Ammo Crate(L)
17. Large Ammo Crate(R)
18. Small Ammo Crate(L)
19. Small Ammo Crate(R)
20. Safe
21. Poor Box
22. Desk
23. Trash Bin
24. Wooden Box
25. Wardrobe
26. Box
27. Box 2
28. Box 3
29. Box 4
Decorations
Each decoration costs 1 Wood or 1 Junk or 1 Metal Parts.
After built, you can choose whether or not you can walk through the object, and whether or not you can shoot through it.
Use Engineering skill to delete decoration.
1. Long Planks
2. Long Planks 2
3. Pole
4. Pole 2
5. Tree
6. Well
7. Wooden Support
8. Wooden Support 2
9. Wooden Support 3
10. Wooden Support 4
11. Chair
12. Chair 2
13. Chair 3
14. Chair 4
15. Chair 5
16. Chair 6
17. Chair 7
18. Chair 8
19. Chair 9
20. Stone Bench
21. Stone Tomb
22. Stone Kitchen
23. Wooden Small Table
24. Restaurant Table
25. Big Table
26. Army Bed
27. Trible Bed
28. Trible Bed 2
29. Trible Bed 3
30. Trible Bed 4
31. Lamp
32. Street Lamp
33. Fire Camp
34. Vault Camp
35. Computer
36. Computer 2
37. Screen
38. Console
39. Console 2
40. Camera
41. Mat
42. Mat 2
43. Junk
44. Trash Bin
45. Tire
Weapons Dummy
Temporary disabled.
Armor Dummy
Temporary disabled.


