Difference between revisions of "War Event"
(→War Event Extras: Removed drug tier upgrade; added one free capture point (Patch 6.4)) |
(→Weapon progression: Updated the section on weapons; improved formatting; added images and a brief introduction; moved extras to the bottom) |
||
| Line 91: | Line 91: | ||
== War Event stats == | == War Event stats == | ||
| − | War Event stats are itemized account-bound bonuses, similar to implants except they cannot be traded between players. They come in two tiers. | + | War Event stats are itemized account-bound stat bonuses, similar to implants except they cannot be traded between players. They come in two tiers. |
*T1 stats are given to all War Event participants. | *T1 stats are given to all War Event participants. | ||
*T2 stats have a 1% chance of dropping after a War Event but only if you have 10 T1 stats installed. | *T2 stats have a 1% chance of dropping after a War Event but only if you have 10 T1 stats installed. | ||
| Line 372: | Line 372: | ||
* +5% HP restored on kill | * +5% HP restored on kill | ||
|} | |} | ||
| − | |||
| − | |||
| − | |||
| − | |||
| − | |||
| − | |||
| − | |||
| − | |||
| − | |||
| − | |||
| − | |||
| − | |||
| − | |||
== Armor progression == | == Armor progression == | ||
| Line 594: | Line 581: | ||
|} | |} | ||
| − | == Weapon | + | == Weapon progression == |
| − | + | When you choose your starting weapon, you commit to its weapon type for the duration of the event so choose wisely. Like armor, weapons gain gear XP through combat, contesting flags, and direct gear XP purchases from the respawn vendor. | |
| − | {| class="wikitable" | + | |
| + | When your weapon reaches level 4, you're able to upgrade it to a higher tier at the cost of 1 capture point via the respawn vendor. | ||
| + | |||
| + | The tables below show every available starting weapon (except stackable throwing items that come in backpacks) and their upgrade paths. | ||
| + | <br> | ||
| + | <br> | ||
| + | {| class="wikitable" style="text-align: center;" | ||
| + | |+ Small Guns | ||
|- | |- | ||
| − | ! | + | ! Weapon type |
| − | ! | + | ! Stage 1 |
| − | ! | + | ! Stage 2 |
| − | ! | + | ! Stage 3 |
| − | ! | + | ! Stage 4 |
| − | ! | + | ! Stage 5 |
| − | |||
|- | |- | ||
| − | ! Fast Pistols: | + | ! [[Fast Pistols]] |
| − | | | + | | style="position: relative;" | [[.44 Magnum Revolver]]<br>[[File:Magnum2.gif|link=]]<br><span style="position: absolute; bottom: 2px; left: 5px; font-size: 0.75em; font-weight: bold; color: #000000; background-color: #d8d8d8; padding: 1px 5px; border-radius: 3px; white-space: nowrap;">Tier II</span> |
| − | + | | style="position: relative;" | [[Needler Pistol]]<br>[[File:Needler.gif|link=]]<br><span style="position: absolute; bottom: 2px; left: 5px; font-size: 0.75em; font-weight: bold; color: #000000; background-color: #7094b1; padding: 1px 5px; border-radius: 3px; white-space: nowrap;">Tier III</span> | |
| − | | Needler Pistol | + | | style="position: relative;" | [[.357 Colt]]<br>[[File:.357 Colt.png|link=]]<br><span style="position: absolute; bottom: 2px; left: 5px; font-size: 0.75em; font-weight: bold; color: #000000; background-color: #82c471; padding: 1px 5px; border-radius: 3px; white-space: nowrap;">Tier IV</span> |
| − | | .357 Colt | + | | style="position: relative;" | [[Anaconda]]<br>[[File:Anaconda.png|link=]]<br><span style="position: absolute; bottom: 2px; left: 5px; font-size: 0.75em; font-weight: bold; color: #000000; background-color: #cf88b6; padding: 1px 5px; border-radius: 3px; white-space: nowrap;">Tier V</span> |
| − | | Anaconda | + | | style="position: relative;" | [[Death's Pistol]]<br>[[File:Death's Pistol.png|link=]]<br><span style="position: absolute; bottom: 2px; left: 5px; font-size: 0.75em; font-weight: bold; color: #ffffff; background-color: #000000; padding: 1px 5px; border-radius: 3px; white-space: nowrap;">Tier VI</span> |
| − | | Death Pistol | ||
|- | |- | ||
| − | ! | + | ! [[Damage Pistols]] |
| − | | | + | | style="position: relative;" | [[10mm Colt]]<br>[[File:10mm Colt.png|link=]]<br><span style="position: absolute; bottom: 2px; left: 5px; font-size: 0.75em; font-weight: bold; color: #000000; background-color: #d8d8d8; padding: 1px 5px; border-radius: 3px; white-space: nowrap;">Tier II</span> |
| − | + | | style="position: relative;" | [[14mm Pistol]]<br>[[File:Smgpstle.gif|link=]]<br><span style="position: absolute; bottom: 2px; left: 5px; font-size: 0.75em; font-weight: bold; color: #000000; background-color: #7094b1; padding: 1px 5px; border-radius: 3px; white-space: nowrap;">Tier III</span> | |
| − | | . | + | | style="position: relative;" | [[14mm Colt]]<br>[[File:14mm Colt.png|link=]]<br><span style="position: absolute; bottom: 2px; left: 5px; font-size: 0.75em; font-weight: bold; color: #000000; background-color: #82c471; padding: 1px 5px; border-radius: 3px; white-space: nowrap;">Tier IV</span> |
| − | | | + | | style="position: relative;" | [[Defender]]<br>[[File:Defender.png|link=]]<br><span style="position: absolute; bottom: 2px; left: 5px; font-size: 0.75em; font-weight: bold; color: #000000; background-color: #cf88b6; padding: 1px 5px; border-radius: 3px; white-space: nowrap;">Tier V</span> |
| − | | | + | | style="position: relative;" | [[Death's Pistol]]<br>[[File:Death's Pistol.png|link=]]<br><span style="position: absolute; bottom: 2px; left: 5px; font-size: 0.75em; font-weight: bold; color: #ffffff; background-color: #000000; padding: 1px 5px; border-radius: 3px; white-space: nowrap;">Tier VI</span> |
| − | |||
|- | |- | ||
| − | ! | + | ! [[Range Pistols]] |
| − | | | + | | <div style="display: flex; flex-wrap: wrap; justify-content: space-around;"> |
| − | + | <div style="width: 45%; text-align: center;"> | |
| − | | | + | <div>[[Desert Eagle]]</div> |
| − | | | + | <div style="position: relative; display: inline-block;">[[File:Magnum.gif|link=]]<br><span style="position: absolute; bottom: 2px; left: 5px; font-size: 0.75em; font-weight: bold; color: #000000; background-color: #d8d8d8; padding: 1px 5px; border-radius: 3px; white-space: nowrap;">Tier II</span></div> |
| − | | | + | </div> |
| − | | Death Pistol | + | <div style="width: 45%; text-align: center;"> |
| + | <div>[[Desert Eagle EM]]</div> | ||
| + | <div style="position: relative; display: inline-block;">[[File:Deagle2.gif|link=]]<br><span style="position: absolute; bottom: 2px; left: 5px; font-size: 0.75em; font-weight: bold; color: #000000; background-color: #d8d8d8; padding: 1px 5px; border-radius: 3px; white-space: nowrap;">Tier II</span></div> | ||
| + | </div> | ||
| + | </div> | ||
| + | | style="position: relative;" | [[.223 Pistol]]<br>[[File:Decker.gif|link=]]<br><span style="position: absolute; bottom: 2px; left: 5px; font-size: 0.75em; font-weight: bold; color: #000000; background-color: #7094b1; padding: 1px 5px; border-radius: 3px; white-space: nowrap;">Tier III</span> | ||
| + | | style="position: relative;" | [[Sniper Pistol]]<br>[[File:Sniper Pistol.png|link=]]<br><span style="position: absolute; bottom: 2px; left: 5px; font-size: 0.75em; font-weight: bold; color: #000000; background-color: #82c471; padding: 1px 5px; border-radius: 3px; white-space: nowrap;">Tier IV</span> | ||
| + | | style="position: relative;" | [[Gauss Pistol]]<br>[[File:Gaussptl.gif|link=]]<br><span style="position: absolute; bottom: 2px; left: 5px; font-size: 0.75em; font-weight: bold; color: #000000; background-color: #cf88b6; padding: 1px 5px; border-radius: 3px; white-space: nowrap;">Tier V</span> | ||
| + | | style="position: relative;" | [[Death's Pistol]]<br>[[File:Death's Pistol.png|link=]]<br><span style="position: absolute; bottom: 2px; left: 5px; font-size: 0.75em; font-weight: bold; color: #ffffff; background-color: #000000; padding: 1px 5px; border-radius: 3px; white-space: nowrap;">Tier VI</span> | ||
|- | |- | ||
| − | ! Sniper Rifles: | + | ! [[Sniper Rifles]] |
| − | | | + | | <div style="display: flex; flex-wrap: wrap; justify-content: space-around;"> |
| − | + | <div style="width: 45%; text-align: center;"> | |
| − | | Sniper Rifle | + | <div>[[Hunting Rifle]]</div> |
| − | | | + | <div style="position: relative; display: inline-block;">[[File:Hrifle.gif|link=]]<br><span style="position: absolute; bottom: 2px; left: 5px; font-size: 0.75em; font-weight: bold; color: #000000; background-color: #d8d8d8; padding: 1px 5px; border-radius: 3px; white-space: nowrap;">Tier II</span></div> |
| − | | | + | </div> |
| − | | Gauss Rifle | + | <div style="width: 45%; text-align: center;"> |
| + | <div>[[Scoped Hunting Rifle]]</div> | ||
| + | <div style="position: relative; display: inline-block;">[[File:Hrifle2.gif|link=]]<br><span style="position: absolute; bottom: 2px; left: 5px; font-size: 0.75em; font-weight: bold; color: #000000; background-color: #d8d8d8; padding: 1px 5px; border-radius: 3px; white-space: nowrap;">Tier II</span></div> | ||
| + | </div> | ||
| + | </div> | ||
| + | | style="position: relative;" | [[Sniper Rifle]]<br>[[File:Sniper.gif|link=]]<br><span style="position: absolute; bottom: 2px; left: 5px; font-size: 0.75em; font-weight: bold; color: #000000; background-color: #7094b1; padding: 1px 5px; border-radius: 3px; white-space: nowrap;">Tier III</span> | ||
| + | | style="position: relative;" | [[SVD Rifle]]<br>[[File:SVD Rifle.png|link=]]<br><span style="position: absolute; bottom: 2px; left: 5px; font-size: 0.75em; font-weight: bold; color: #000000; background-color: #82c471; padding: 1px 5px; border-radius: 3px; white-space: nowrap;">Tier IV</span> | ||
| + | | style="position: relative;" | [[SVD Rifle MKII]]<br>[[File:SVD_Rifle_MKII.png|link=]]<br><span style="position: absolute; bottom: 2px; left: 5px; font-size: 0.75em; font-weight: bold; color: #000000; background-color: #cf88b6; padding: 1px 5px; border-radius: 3px; white-space: nowrap;">Tier V</span> | ||
| + | | style="position: relative;" | [[Gauss Rifle]]<br>[[File:M72gauss.gif|link=]]<br><span style="position: absolute; bottom: 2px; left: 5px; font-size: 0.75em; font-weight: bold; color: #ffffff; background-color: #000000; padding: 1px 5px; border-radius: 3px; white-space: nowrap;">Tier VI</span> | ||
|- | |- | ||
| − | ! Shotguns: | + | ! Shotguns |
| − | | | + | | style="position: relative;" | [[Sawed-Off Shotgun]]<br>[[File:Soshotgn.gif|link=]]<br><span style="position: absolute; bottom: 2px; left: 5px; font-size: 0.75em; font-weight: bold; color: #000000; background-color: #d8d8d8; padding: 1px 5px; border-radius: 3px; white-space: nowrap;">Tier II</span> |
| − | + | | style="position: relative;" | [[Combat Shotgun]]<br>[[File:Assshot.gif|link=]]<br><span style="position: absolute; bottom: 2px; left: 5px; font-size: 0.75em; font-weight: bold; color: #000000; background-color: #7094b1; padding: 1px 5px; border-radius: 3px; white-space: nowrap;">Tier III</span> | |
| − | | Combat Shotgun | + | | style="position: relative;" | [[H&K CAWS]]<br>[[File:Hkcaws.gif|link=]]<br><span style="position: absolute; bottom: 2px; left: 5px; font-size: 0.75em; font-weight: bold; color: #000000; background-color: #82c471; padding: 1px 5px; border-radius: 3px; white-space: nowrap;">Tier IV</span> |
| − | | | + | | style="position: relative;" | [[Pancor Jackhammer]]<br>[[File:Jackhamr.gif|link=]]<br><span style="position: absolute; bottom: 2px; left: 5px; font-size: 0.75em; font-weight: bold; color: #000000; background-color: #cf88b6; padding: 1px 5px; border-radius: 3px; white-space: nowrap;">Tier V</span> |
| − | | Pancor Jackhammer | + | | style="position: relative;" | [[Saiga-12]]<br>[[File:Saiga-12Updated.gif|link=]]<br><span style="position: absolute; bottom: 2px; left: 5px; font-size: 0.75em; font-weight: bold; color: #ffffff; background-color: #000000; padding: 1px 5px; border-radius: 3px; white-space: nowrap;">Tier VI</span> |
| − | | Saiga-12 | ||
|- | |- | ||
| − | ! | + | ! [[Assault Rifles]] |
| − | + | | <div style="display: flex; flex-wrap: wrap; justify-content: space-around;"> | |
| − | + | <div style="width: 45%; text-align: center;"> | |
| − | | XL70E3 | + | <div>[[Assault Rifle]]</div> |
| − | | Military Rifle | + | <div style="position: relative; display: inline-block;">[[File:Grifle.gif|link=]]<br><span style="position: absolute; bottom: 2px; left: 5px; font-size: 0.75em; font-weight: bold; color: #000000; background-color: #d8d8d8; padding: 1px 5px; border-radius: 3px; white-space: nowrap;">Tier II</span></div> |
| − | | | + | </div> |
| − | | G36c | + | <div style="width: 45%; text-align: center;"> |
| + | <div>[[Assault Rifle EM]]</div> | ||
| + | <div style="position: relative; display: inline-block;">[[File:Assrifl2.gif|link=]]<br><span style="position: absolute; bottom: 2px; left: 5px; font-size: 0.75em; font-weight: bold; color: #000000; background-color: #d8d8d8; padding: 1px 5px; border-radius: 3px; white-space: nowrap;">Tier II</span></div> | ||
| + | </div> | ||
| + | </div> | ||
| + | | style="position: relative;" | [[XL70E3]]<br>[[File:Indweap.gif|link=]]<br><span style="position: absolute; bottom: 2px; left: 5px; font-size: 0.75em; font-weight: bold; color: #000000; background-color: #7094b1; padding: 1px 5px; border-radius: 3px; white-space: nowrap;">Tier III</span> | ||
| + | | style="position: relative;" | [[Military Rifle]]<br>[[File:Military_Rifle.gif|link=]]<br><span style="position: absolute; bottom: 2px; left: 5px; font-size: 0.75em; font-weight: bold; color: #000000; background-color: #82c471; padding: 1px 5px; border-radius: 3px; white-space: nowrap;">Tier IV</span> | ||
| + | | style="position: relative;" | [[AK-47]]<br>[[File:AK-47.png|link=]]<br><span style="position: absolute; bottom: 2px; left: 5px; font-size: 0.75em; font-weight: bold; color: #000000; background-color: #cf88b6; padding: 1px 5px; border-radius: 3px; white-space: nowrap;">Tier V</span> | ||
| + | | style="position: relative;" | [[H&K G36c]]<br>[[File:H&K G36c.png|link=]]<br><span style="position: absolute; bottom: 2px; left: 5px; font-size: 0.75em; font-weight: bold; color: #ffffff; background-color: #000000; padding: 1px 5px; border-radius: 3px; white-space: nowrap;">Tier VI</span> | ||
|- | |- | ||
| − | ! Explosive Small Guns: | + | ! Explosive Small Guns |
| − | | Grenade | + | | style="position: relative;" | [[M79 Grenade Launcher]]<br>[[File:M79 Grenade Launcher.png|link=]]<br><span style="position: absolute; bottom: 2px; left: 5px; font-size: 0.75em; font-weight: bold; color: #000000; background-color: #d8d8d8; padding: 1px 5px; border-radius: 3px; white-space: nowrap;">Tier II</span> |
| − | + | | style="position: relative;" | [[MGL M32]]<br>[[File:M32MGL.png|link=]]<br><span style="position: absolute; bottom: 2px; left: 5px; font-size: 0.75em; font-weight: bold; color: #000000; background-color: #7094b1; padding: 1px 5px; border-radius: 3px; white-space: nowrap;">Tier III</span> | |
| − | | MGL | + | | style="position: relative;" | [[MGL M32s]]<br>[[File:MGL M32s.png|link=]]<br><span style="position: absolute; bottom: 2px; left: 5px; font-size: 0.75em; font-weight: bold; color: #000000; background-color: #82c471; padding: 1px 5px; border-radius: 3px; white-space: nowrap;">Tier IV</span> |
| − | | | + | | style="position: relative;" | [[Automatic Grenade Launcher]]<br>[[File:Automatic Grenade Launcher.png|link=]]<br><span style="position: absolute; bottom: 2px; left: 5px; font-size: 0.75em; font-weight: bold; color: #000000; background-color: #cf88b6; padding: 1px 5px; border-radius: 3px; white-space: nowrap;">Tier V</span> |
| − | | | + | | style="position: relative;" | [[C4 Launcher]]<br>[[File:C4 Launcher.png|80px|link=]]<br><span style="position: absolute; bottom: 2px; left: 5px; font-size: 0.75em; font-weight: bold; color: #ffffff; background-color: #000000; padding: 1px 5px; border-radius: 3px; white-space: nowrap;">Tier VI</span> |
| − | | C4 Launcher | ||
|- | |- | ||
| − | ! Support Rifles: | + | ! [[Support Rifles]] |
| − | | | + | | style="position: relative;" | [[FN FAL]]<br>[[File:Fnfal.gif|link=]]<br><span style="position: absolute; bottom: 2px; left: 5px; font-size: 0.75em; font-weight: bold; color: #000000; background-color: #d8d8d8; padding: 1px 5px; border-radius: 3px; white-space: nowrap;">Tier II</span> |
| − | + | | style="position: relative;" | [[M16]]<br>[[File:M16 1.gif|link=]]<br><span style="position: absolute; bottom: 2px; left: 5px; font-size: 0.75em; font-weight: bold; color: #000000; background-color: #7094b1; padding: 1px 5px; border-radius: 3px; white-space: nowrap;">Tier III</span> | |
| − | | M16 | + | | style="position: relative;" | [[M16 MKII]]<br>[[File:M16 MKII.png|link=]]<br><span style="position: absolute; bottom: 2px; left: 5px; font-size: 0.75em; font-weight: bold; color: #000000; background-color: #82c471; padding: 1px 5px; border-radius: 3px; white-space: nowrap;">Tier IV</span> |
| − | | M16 | + | | style="position: relative;" | [[Steyr]]<br>[[File:Steyr.gif|link=]]<br><span style="position: absolute; bottom: 2px; left: 5px; font-size: 0.75em; font-weight: bold; color: #000000; background-color: #cf88b6; padding: 1px 5px; border-radius: 3px; white-space: nowrap;">Tier V</span> |
| − | | Steyr | + | | style="position: relative;" | [[Gauss Support Weapon]]<br>[[File:Gauss Support Weapon.png|link=]]<br><span style="position: absolute; bottom: 2px; left: 5px; font-size: 0.75em; font-weight: bold; color: #ffffff; background-color: #000000; padding: 1px 5px; border-radius: 3px; white-space: nowrap;">Tier VI</span> |
| − | | Gauss Support Weapon | ||
|- | |- | ||
| − | ! | + | ! [[SMGs]] |
| − | | | + | | style="position: relative;" | [[10mm SMG]]<br>[[File:Uzi.gif|link=]]<br><span style="position: absolute; bottom: 2px; left: 5px; font-size: 0.75em; font-weight: bold; color: #000000; background-color: #d8d8d8; padding: 1px 5px; border-radius: 3px; white-space: nowrap;">Tier II</span> |
| − | + | | style="position: relative;" | [[H&K P90c]]<br>[[File:Hkp90c.gif|link=]]<br><span style="position: absolute; bottom: 2px; left: 5px; font-size: 0.75em; font-weight: bold; color: #000000; background-color: #7094b1; padding: 1px 5px; border-radius: 3px; white-space: nowrap;">Tier III</span> | |
| − | | P90c | + | | style="position: relative;" | [[H&K MP5]]<br>[[File:H&K MP5.png|link=]]<br><span style="position: absolute; bottom: 2px; left: 5px; font-size: 0.75em; font-weight: bold; color: #000000; background-color: #82c471; padding: 1px 5px; border-radius: 3px; white-space: nowrap;">Tier IV</span> |
| − | | MP5 | + | | style="position: relative;" | [[H&K G11]]<br>[[File:Hkg11.gif|link=]]<br><span style="position: absolute; bottom: 2px; left: 5px; font-size: 0.75em; font-weight: bold; color: #000000; background-color: #cf88b6; padding: 1px 5px; border-radius: 3px; white-space: nowrap;">Tier V</span> |
| − | | G11 | + | | style="position: relative;" | [[H&K G11E]]<br>[[File:Hkg11e.gif|link=]]<br><span style="position: absolute; bottom: 2px; left: 5px; font-size: 0.75em; font-weight: bold; color: #ffffff; background-color: #000000; padding: 1px 5px; border-radius: 3px; white-space: nowrap;">Tier VI</span> |
| − | | | + | |} |
| + | <br> | ||
| + | <br> | ||
| + | {| class="wikitable" style="text-align: center;" | ||
| + | |+ Big Guns | ||
|- | |- | ||
| − | ! | + | ! Weapon type |
| − | + | ! Stage 1 | |
| − | ! | + | ! Stage 2 |
| − | + | ! Stage 3 | |
| − | + | ! Stage 4 | |
| − | |||
| − | |||
|- | |- | ||
| − | ! | + | ! [[Machine Guns]] |
| − | | | + | | style="position: relative;" | [[Lewis MKII]]<br>[[File:Lewis MKII.png|link=]]<br><span style="position: absolute; bottom: 2px; left: 5px; font-size: 0.75em; font-weight: bold; color: #000000; background-color: #d8d8d8; padding: 1px 5px; border-radius: 3px; white-space: nowrap;">Tier II</span> |
| − | + | | style="position: relative;" | [[M60]]<br>[[File:M60.gif|link=]]<br><span style="position: absolute; bottom: 2px; left: 5px; font-size: 0.75em; font-weight: bold; color: #000000; background-color: #7094b1; padding: 1px 5px; border-radius: 3px; white-space: nowrap;">Tier III</span> | |
| − | | | + | | style="position: relative;" | [[M240]]<br>[[File:M240.png|link=]]<br><span style="position: absolute; bottom: 2px; left: 5px; font-size: 0.75em; font-weight: bold; color: #000000; background-color: #82c471; padding: 1px 5px; border-radius: 3px; white-space: nowrap;">Tier IV</span> |
| − | | | + | | style="position: relative;" | [[Browning Auto Rifle]]<br>[[File:Browning auto rifle.gif|link=]]<br><span style="position: absolute; bottom: 2px; left: 5px; font-size: 0.75em; font-weight: bold; color: #000000; background-color: #cf88b6; padding: 1px 5px; border-radius: 3px; white-space: nowrap;">Tier V</span> |
| − | | | ||
| − | | | ||
|- | |- | ||
| − | ! | + | ! [[Flamers]] |
| − | | | + | | style="position: relative;" | [[Flamer]]<br>[[File:Flamethr.gif|link=]]<br><span style="position: absolute; bottom: 2px; left: 5px; font-size: 0.75em; font-weight: bold; color: #000000; background-color: #d8d8d8; padding: 1px 5px; border-radius: 3px; white-space: nowrap;">Tier II</span> |
| − | + | | style="position: relative;" | [[Improved Flamer]]<br>[[File:Iflameth.gif|link=]]<br><span style="position: absolute; bottom: 2px; left: 5px; font-size: 0.75em; font-weight: bold; color: #000000; background-color: #7094b1; padding: 1px 5px; border-radius: 3px; white-space: nowrap;">Tier III</span> | |
| − | | | + | | style="position: relative;" | [[Incinerator]]<br>[[File:Incinerator.png|link=]]<br><span style="position: absolute; bottom: 2px; left: 5px; font-size: 0.75em; font-weight: bold; color: #000000; background-color: #82c471; padding: 1px 5px; border-radius: 3px; white-space: nowrap;">Tier IV</span> |
| − | | | + | | style="position: relative;" | [[Napalm Blaster]]<br>[[File:FlamerN.gif|link=]]<br><span style="position: absolute; bottom: 2px; left: 5px; font-size: 0.75em; font-weight: bold; color: #000000; background-color: #cf88b6; padding: 1px 5px; border-radius: 3px; white-space: nowrap;">Tier V</span> |
| − | | | ||
| − | | | ||
|- | |- | ||
| − | ! | + | ! [[Miniguns]] |
| − | | | + | | style="position: relative;" | [[Minigun]]<br>[[File:Minigun.gif|link=]]<br><span style="position: absolute; bottom: 2px; left: 5px; font-size: 0.75em; font-weight: bold; color: #000000; background-color: #d8d8d8; padding: 1px 5px; border-radius: 3px; white-space: nowrap;">Tier II</span> |
| − | + | | style="position: relative;" | [[Avenger Minigun]]<br>[[File:Aminigun.gif|link=]]<br><span style="position: absolute; bottom: 2px; left: 5px; font-size: 0.75em; font-weight: bold; color: #000000; background-color: #7094b1; padding: 1px 5px; border-radius: 3px; white-space: nowrap;">Tier III</span> | |
| − | | | + | | style="position: relative;" | [[Vindicator Minigun]]<br>[[File:Vminigun.gif|link=]]<br><span style="position: absolute; bottom: 2px; left: 5px; font-size: 0.75em; font-weight: bold; color: #000000; background-color: #82c471; padding: 1px 5px; border-radius: 3px; white-space: nowrap;">Tier IV</span> |
| − | | | + | | style="position: relative;" | [[Gauss Minigun]]<br>[[File:Gauss Minigun.png|link=]]<br><span style="position: absolute; bottom: 2px; left: 5px; font-size: 0.75em; font-weight: bold; color: #000000; background-color: #cf88b6; padding: 1px 5px; border-radius: 3px; white-space: nowrap;">Tier V</span> |
| − | | | ||
| − | | | ||
|- | |- | ||
| − | ! | + | ! [[Rocket Launchers]] |
| − | | | + | | style="position: relative;" | [[Rocket Launcher]]<br>[[File:Rocketlauncher.png|link=]]<br><span style="position: absolute; bottom: 2px; left: 5px; font-size: 0.75em; font-weight: bold; color: #000000; background-color: #d8d8d8; padding: 1px 5px; border-radius: 3px; white-space: nowrap;">Tier II</span> |
| − | + | | style="position: relative;" | [[BigBazooka]]<br>[[File:Rlaunch.gif|link=]]<br><span style="position: absolute; bottom: 2px; left: 5px; font-size: 0.75em; font-weight: bold; color: #000000; background-color: #7094b1; padding: 1px 5px; border-radius: 3px; white-space: nowrap;">Tier III</span> | |
| − | | | + | | style="position: relative;" | [[Adv. Rocket Launcher]]<br>[[File:Adv. Rocket Launcher.png|link=]]<br><span style="position: absolute; bottom: 2px; left: 5px; font-size: 0.75em; font-weight: bold; color: #000000; background-color: #82c471; padding: 1px 5px; border-radius: 3px; white-space: nowrap;">Tier IV</span> |
| − | | | + | | style="position: relative;" | [[Flash Launcher]]<br>[[File:Flash Launcher.png|link=]]<br><span style="position: absolute; bottom: 2px; left: 5px; font-size: 0.75em; font-weight: bold; color: #000000; background-color: #cf88b6; padding: 1px 5px; border-radius: 3px; white-space: nowrap;">Tier V</span> |
| − | | | ||
| − | | | ||
|- | |- | ||
| − | ! | + | ! [[Heavy Sniper Rifles]] |
| − | + | | style="position: relative;" | [[Heavy Rifle]]<br>[[File:Heavy Rifle.png|link=]]<br><span style="position: absolute; bottom: 2px; left: 5px; font-size: 0.75em; font-weight: bold; color: #000000; background-color: #d8d8d8; padding: 1px 5px; border-radius: 3px; white-space: nowrap;">Tier II</span> | |
| − | | | + | | style="position: relative;" | [[Light Support Weapon|LSW]]<br>[[File:Lightsup.gif|link=]]<br><span style="position: absolute; bottom: 2px; left: 5px; font-size: 0.75em; font-weight: bold; color: #000000; background-color: #7094b1; padding: 1px 5px; border-radius: 3px; white-space: nowrap;">Tier III</span> |
| − | | | + | | style="position: relative;" | [[DSR]]<br>[[File:DSR.png|link=]]<br><span style="position: absolute; bottom: 2px; left: 5px; font-size: 0.75em; font-weight: bold; color: #000000; background-color: #82c471; padding: 1px 5px; border-radius: 3px; white-space: nowrap;">Tier IV</span> |
| − | | | + | | style="position: relative;" | [[Bozar]]<br>[[File:Bozar.gif|link=]]<br><span style="position: absolute; bottom: 2px; left: 5px; font-size: 0.75em; font-weight: bold; color: #000000; background-color: #cf88b6; padding: 1px 5px; border-radius: 3px; white-space: nowrap;">Tier V</span> |
| − | | | + | |} |
| − | | | + | <br> |
| + | <br> | ||
| + | {| class="wikitable" style="text-align: center;" | ||
| + | |+ Energy Weapons | ||
|- | |- | ||
| − | ! | + | ! Weapon type |
| − | ! | + | ! Stage 1 |
| − | + | ! Stage 2 | |
| − | + | ! Stage 3 | |
| − | + | ! Stage 4 | |
| − | + | ! Stage 5 | |
| − | + | ! Stage 6 | |
|- | |- | ||
| − | ! | + | ! [[Laser Weapons]] |
| − | + | | style="position: relative;" | [[Laser Pistol]]<br>[[File:Lasergun.gif|link=]]<br><span style="position: absolute; bottom: 2px; left: 5px; font-size: 0.75em; font-weight: bold; color: #000000; background-color: #e8e8e8; padding: 1px 5px; border-radius: 3px; white-space: nowrap;">Tier I</span> | |
| − | | | + | | style="position: relative;" | [[Magneto-Laser Pistol]]<br>[[File:Mlaspist.gif|link=]]<br><span style="position: absolute; bottom: 2px; left: 5px; font-size: 0.75em; font-weight: bold; color: #000000; background-color: #d8d8d8; padding: 1px 5px; border-radius: 3px; white-space: nowrap;">Tier II</span> |
| − | | | + | | style="position: relative;" | [[Laser Rifle]]<br>[[File:Lrifle.gif|link=]]<br><span style="position: absolute; bottom: 2px; left: 5px; font-size: 0.75em; font-weight: bold; color: #000000; background-color: #7094b1; padding: 1px 5px; border-radius: 3px; white-space: nowrap;">Tier III</span> |
| − | | | + | | style="position: relative;" | [[Gatling Laser]]<br>[[File:Minilazr.gif|link=]]<br><span style="position: absolute; bottom: 2px; left: 5px; font-size: 0.75em; font-weight: bold; color: #000000; background-color: #82c471; padding: 1px 5px; border-radius: 3px; white-space: nowrap;">Tier IV</span> |
| − | | | + | | style="position: relative;" | [[Commissar's Pistol]]<br>[[File:TeslaPistol.gif|link=]]<br><span style="position: absolute; bottom: 2px; left: 5px; font-size: 0.75em; font-weight: bold; color: #000000; background-color: #cf88b6; padding: 1px 5px; border-radius: 3px; white-space: nowrap;">Tier V</span> |
| − | | | + | | style="position: relative;" | [[Turbolaser]]<br>[[File:Turbolaser.png|link=]]<br><span style="position: absolute; bottom: 2px; left: 5px; font-size: 0.75em; font-weight: bold; color: #ffffff; background-color: #000000; padding: 1px 5px; border-radius: 3px; white-space: nowrap;">Tier VI</span> |
|- | |- | ||
| − | ! | + | ! [[Plasma Weapons]] |
| − | + | | style="position: relative;" | [[Plasma Pistol]]<br>[[File:Glock.gif|link=]]<br><span style="position: absolute; bottom: 2px; left: 5px; font-size: 0.75em; font-weight: bold; color: #000000; background-color: #e8e8e8; padding: 1px 5px; border-radius: 3px; white-space: nowrap;">Tier I</span> | |
| − | | | + | | style="position: relative;" | [[Plasma Pistol MKII]]<br>[[File:Plaspst2.gif|link=]]<br><span style="position: absolute; bottom: 2px; left: 5px; font-size: 0.75em; font-weight: bold; color: #000000; background-color: #d8d8d8; padding: 1px 5px; border-radius: 3px; white-space: nowrap;">Tier II</span> |
| − | | | + | | style="position: relative;" | [[Plasma SMG]]<br>[[File:DAMPistol.gif|link=]]<br><span style="position: absolute; bottom: 2px; left: 5px; font-size: 0.75em; font-weight: bold; color: #000000; background-color: #7094b1; padding: 1px 5px; border-radius: 3px; white-space: nowrap;">Tier III</span> |
| − | | | + | | style="position: relative;" | [[Plasma Rifle]]<br>[[File:Plasma.gif|link=]]<br><span style="position: absolute; bottom: 2px; left: 5px; font-size: 0.75em; font-weight: bold; color: #000000; background-color: #82c471; padding: 1px 5px; border-radius: 3px; white-space: nowrap;">Tier IV</span> |
| − | | | + | | style="position: relative;" | [[Turbo Plasma Rifle]]<br>[[File:Plas2.gif|link=]]<br><span style="position: absolute; bottom: 2px; left: 5px; font-size: 0.75em; font-weight: bold; color: #000000; background-color: #cf88b6; padding: 1px 5px; border-radius: 3px; white-space: nowrap;">Tier V</span> |
| − | | | + | | style="position: relative;" | [[Plasma Gatling]]<br>[[File:Plasmagat.gif|link=]]<br><span style="position: absolute; bottom: 2px; left: 5px; font-size: 0.75em; font-weight: bold; color: #ffffff; background-color: #000000; padding: 1px 5px; border-radius: 3px; white-space: nowrap;">Tier VI</span> |
|- | |- | ||
| − | ! | + | ! [[Fire Weapons]] |
| − | | | + | | style="position: relative;" | [[Signal Pistol]]<br>[[File:Signal pistol.png|link=]]<br><span style="position: absolute; bottom: 2px; left: 5px; font-size: 0.75em; font-weight: bold; color: #000000; background-color: #e8e8e8; padding: 1px 5px; border-radius: 3px; white-space: nowrap;">Tier I</span> |
| − | + | | style="position: relative;" | [[Solar Scorcher]]<br>[[File:Solarscr.gif|link=]]<br><span style="position: absolute; bottom: 2px; left: 5px; font-size: 0.75em; font-weight: bold; color: #000000; background-color: #d8d8d8; padding: 1px 5px; border-radius: 3px; white-space: nowrap;">Tier II</span> | |
| − | | | + | | style="position: relative;" | [[Fire Rifle]]<br>[[File:Fire Rifle.png|link=]]<br><span style="position: absolute; bottom: 2px; left: 5px; font-size: 0.75em; font-weight: bold; color: #000000; background-color: #7094b1; padding: 1px 5px; border-radius: 3px; white-space: nowrap;">Tier III</span> |
| − | | | + | | style="position: relative;" | [[Alien Blaster]]<br>[[File:Ufogun.gif|link=]]<br><span style="position: absolute; bottom: 2px; left: 5px; font-size: 0.75em; font-weight: bold; color: #000000; background-color: #82c471; padding: 1px 5px; border-radius: 3px; white-space: nowrap;">Tier IV</span> |
| − | | | + | | style="position: relative;" | [[Pyro Rifle]]<br>[[File:Pyro Rifle.png|link=]]<br><span style="position: absolute; bottom: 2px; left: 5px; font-size: 0.75em; font-weight: bold; color: #000000; background-color: #cf88b6; padding: 1px 5px; border-radius: 3px; white-space: nowrap;">Tier V</span> |
| − | | | + | | style="position: relative;" | [[Heat Machine]]<br>[[File:Heat Machine.png|116px|link=]]<br><span style="position: absolute; bottom: 2px; left: 5px; font-size: 0.75em; font-weight: bold; color: #ffffff; background-color: #000000; padding: 1px 5px; border-radius: 3px; white-space: nowrap;">Tier VI</span> |
|- | |- | ||
| − | ! | + | ! [[Electric Weapons]] |
| − | | | + | | style="position: relative;" | [[Electric Zip Gun]]<br>[[File:Electric Zip Gun.png|link=]]<br><span style="position: absolute; bottom: 2px; left: 5px; font-size: 0.75em; font-weight: bold; color: #000000; background-color: #e8e8e8; padding: 1px 5px; border-radius: 3px; white-space: nowrap;">Tier I</span> |
| − | + | | style="position: relative;" | [[Pulse Pistol]]<br>[[File:Pulsepst.gif|link=]]<br><span style="position: absolute; bottom: 2px; left: 5px; font-size: 0.75em; font-weight: bold; color: #000000; background-color: #d8d8d8; padding: 1px 5px; border-radius: 3px; white-space: nowrap;">Tier II</span> | |
| − | | | + | | style="position: relative;" | [[ELECTRO Launcher]]<br>[[File:RocketEle.gif|link=]]<br><span style="position: absolute; bottom: 2px; left: 5px; font-size: 0.75em; font-weight: bold; color: #000000; background-color: #7094b1; padding: 1px 5px; border-radius: 3px; white-space: nowrap;">Tier III</span> |
| − | | | + | | style="position: relative;" | [[Prototype 14]]<br>[[File:Prototype 14.png|link=]]<br><span style="position: absolute; bottom: 2px; left: 5px; font-size: 0.75em; font-weight: bold; color: #000000; background-color: #82c471; padding: 1px 5px; border-radius: 3px; white-space: nowrap;">Tier IV</span> |
| − | | | + | | style="position: relative;" | [[Electro Cannon]]<br>[[File:Electro Cannon.png|link=]]<br><span style="position: absolute; bottom: 2px; left: 5px; font-size: 0.75em; font-weight: bold; color: #000000; background-color: #cf88b6; padding: 1px 5px; border-radius: 3px; white-space: nowrap;">Tier V</span> |
| − | | | + | | style="position: relative;" | [[Pulse Rifle]]<br>[[File:Pulserif.gif|link=]]<br><span style="position: absolute; bottom: 2px; left: 5px; font-size: 0.75em; font-weight: bold; color: #ffffff; background-color: #000000; padding: 1px 5px; border-radius: 3px; white-space: nowrap;">Tier VI</span> |
| + | |} | ||
| + | <br> | ||
| + | <br> | ||
| + | {| class="wikitable" style="text-align: center;" | ||
| + | |+ Melee Weapons | ||
| + | |- | ||
| + | ! Weapon type | ||
| + | ! Stage 1 | ||
| + | ! Stage 2 | ||
| + | ! Stage 3 | ||
| + | ! Stage 4 | ||
|- | |- | ||
| − | ! | + | ! [[Clubs]] |
| − | | | + | | style="position: relative;" | [[Cattle Prod]]<br>[[File:Cprod3.gif|link=]]<br><span style="position: absolute; bottom: 2px; left: 5px; font-size: 0.75em; font-weight: bold; color: #000000; background-color: #d8d8d8; padding: 1px 5px; border-radius: 3px; white-space: nowrap;">Tier II</span> |
| − | + | | style="position: relative;" | [[Super Cattle Prod]]<br>[[File:Catprod2.gif|link=]]<br><span style="position: absolute; bottom: 2px; left: 5px; font-size: 0.75em; font-weight: bold; color: #000000; background-color: #7094b1; padding: 1px 5px; border-radius: 3px; white-space: nowrap;">Tier III</span> | |
| − | | | + | | style="position: relative;" | [[Plasma Torch]]<br>[[File:Plmtorch.gif|link=]]<br><span style="position: absolute; bottom: 2px; left: 5px; font-size: 0.75em; font-weight: bold; color: #000000; background-color: #82c471; padding: 1px 5px; border-radius: 3px; white-space: nowrap;">Tier IV</span> |
| − | | | + | | style="position: relative;" | [[Bass Rape]]<br>[[File:Bass Rape.png|135px|link=]]<br><span style="position: absolute; bottom: 2px; left: 5px; font-size: 0.75em; font-weight: bold; color: #ffffff; background-color: #000000; padding: 1px 5px; border-radius: 3px; white-space: nowrap;">Tier VI</span> |
| − | | | ||
| − | | | ||
|- | |- | ||
| − | ! | + | ! [[Fast Knives]] |
| − | | | + | | style="position: relative;" | [[Shiv]]<br>[[File:Shiv.gif|link=]]<br><span style="position: absolute; bottom: 2px; left: 5px; font-size: 0.75em; font-weight: bold; color: #000000; background-color: #d8d8d8; padding: 1px 5px; border-radius: 3px; white-space: nowrap;">Tier II</span> |
| − | + | | style="position: relative;" | "[[Little Jesus]]"<br>[[File:Jknife.gif|link=]]<br><span style="position: absolute; bottom: 2px; left: 5px; font-size: 0.75em; font-weight: bold; color: #000000; background-color: #7094b1; padding: 1px 5px; border-radius: 3px; white-space: nowrap;">Tier III</span> | |
| − | | | + | | style="position: relative;" | [[Machete]]<br>[[File:Machete.png|link=]]<br><span style="position: absolute; bottom: 2px; left: 5px; font-size: 0.75em; font-weight: bold; color: #000000; background-color: #82c471; padding: 1px 5px; border-radius: 3px; white-space: nowrap;">Tier IV</span> |
| − | | | + | | style="position: relative;" | [[Bass Rape]]<br>[[File:Bass Rape.png|135px|link=]]<br><span style="position: absolute; bottom: 2px; left: 5px; font-size: 0.75em; font-weight: bold; color: #ffffff; background-color: #000000; padding: 1px 5px; border-radius: 3px; white-space: nowrap;">Tier VI</span> |
| − | | | ||
| − | | | ||
|- | |- | ||
| − | ! | + | ! [[Damage Knives]] |
| − | | | + | | style="position: relative;" | [[Combat Knife]]<br>[[File:Knife3.gif|link=]]<br><span style="position: absolute; bottom: 2px; left: 5px; font-size: 0.75em; font-weight: bold; color: #000000; background-color: #d8d8d8; padding: 1px 5px; border-radius: 3px; white-space: nowrap;">Tier II</span> |
| − | + | | style="position: relative;" | [[Wakizashi Blade]]<br>[[File:Wknife.gif|link=]]<br><span style="position: absolute; bottom: 2px; left: 5px; font-size: 0.75em; font-weight: bold; color: #000000; background-color: #7094b1; padding: 1px 5px; border-radius: 3px; white-space: nowrap;">Tier III</span> | |
| − | | | + | | style="position: relative;" | [[Ripper]]<br>[[File:Vblade.gif|link=]]<br><span style="position: absolute; bottom: 2px; left: 5px; font-size: 0.75em; font-weight: bold; color: #000000; background-color: #82c471; padding: 1px 5px; border-radius: 3px; white-space: nowrap;">Tier IV</span> |
| − | | | + | | style="position: relative;" | [[Bass Rape]]<br>[[File:Bass Rape.png|135px|link=]]<br><span style="position: absolute; bottom: 2px; left: 5px; font-size: 0.75em; font-weight: bold; color: #ffffff; background-color: #000000; padding: 1px 5px; border-radius: 3px; white-space: nowrap;">Tier VI</span> |
| − | | | ||
| − | | | ||
|- | |- | ||
| − | ! | + | ! [[Punch Weapons]] |
| − | | | + | | <div style="display: flex; flex-wrap: wrap; justify-content: space-around;"> |
| − | | | + | <div style="width: 45%; text-align: center;"> |
| − | | | + | <div>[[Power Fist]]</div> |
| − | | | + | <div style="position: relative; display: inline-block;">[[File:Gaunt.gif|link=]]<br><span style="position: absolute; bottom: 2px; left: 5px; font-size: 0.75em; font-weight: bold; color: #000000; background-color: #d8d8d8; padding: 1px 5px; border-radius: 3px; white-space: nowrap;">Tier II</span></div> |
| − | | | + | </div> |
| − | | | + | <div style="width: 45%; text-align: center;"> |
| + | <div>[[Boxing Gloves]]</div> | ||
| + | <div style="position: relative; display: inline-block;">[[File:Boxglove.gif|link=]]<br><span style="position: absolute; bottom: 2px; left: 5px; font-size: 0.75em; font-weight: bold; color: #000000; background-color: #d8d8d8; padding: 1px 5px; border-radius: 3px; white-space: nowrap;">Tier II</span></div> | ||
| + | </div> | ||
| + | </div> | ||
| + | | style="position: relative;" | [[Mega Power Fist]]<br>[[File:Mpwrfist.gif|link=]]<br><span style="position: absolute; bottom: 2px; left: 5px; font-size: 0.75em; font-weight: bold; color: #000000; background-color: #7094b1; padding: 1px 5px; border-radius: 3px; white-space: nowrap;">Tier III</span> | ||
| + | | style="position: relative;" | [[Punch Gun]]<br>[[File:Punch Gun.png|link=]]<br><span style="position: absolute; bottom: 2px; left: 5px; font-size: 0.75em; font-weight: bold; color: #000000; background-color: #82c471; padding: 1px 5px; border-radius: 3px; white-space: nowrap;">Tier IV</span> | ||
| + | | style="position: relative;" | [[Bass Rape]]<br>[[File:Bass Rape.png|135px|link=]]<br><span style="position: absolute; bottom: 2px; left: 5px; font-size: 0.75em; font-weight: bold; color: #ffffff; background-color: #000000; padding: 1px 5px; border-radius: 3px; white-space: nowrap;">Tier VI</span> | ||
|- | |- | ||
| + | ! [[Hammers]] | ||
| + | | style="position: relative;" | [[Sledgehammer]]<br>[[File:Sledge.gif|link=]]<br><span style="position: absolute; bottom: 2px; left: 5px; font-size: 0.75em; font-weight: bold; color: #000000; background-color: #d8d8d8; padding: 1px 5px; border-radius: 3px; white-space: nowrap;">Tier II</span> | ||
| + | | <div style="display: flex; flex-wrap: wrap; justify-content: space-around;"> | ||
| + | <div style="width: 45%; text-align: center;"> | ||
| + | <div>[[Super Sledge]]</div> | ||
| + | <div style="position: relative; display: inline-block;">[[File:Ssledge2.gif|link=]]<br><span style="position: absolute; bottom: 2px; left: 5px; font-size: 0.75em; font-weight: bold; color: #000000; background-color: #7094b1; padding: 1px 5px; border-radius: 3px; white-space: nowrap;">Tier III</span></div> | ||
| + | </div> | ||
| + | <div style="width: 45%; text-align: center;"> | ||
| + | <div>[[Louisville Slugger]]</div> | ||
| + | <div style="position: relative; display: inline-block;">[[File:Slugger.gif|link=]]<br><span style="position: absolute; bottom: 2px; left: 5px; font-size: 0.75em; font-weight: bold; color: #000000; background-color: #7094b1; padding: 1px 5px; border-radius: 3px; white-space: nowrap;">Tier III</span></div> | ||
| + | </div> | ||
| + | </div> | ||
| + | | style="position: relative;" | [[Mega Sledge]]<br>[[File:Mega Sledge.png|link=]]<br><span style="position: absolute; bottom: 2px; left: 5px; font-size: 0.75em; font-weight: bold; color: #000000; background-color: #82c471; padding: 1px 5px; border-radius: 3px; white-space: nowrap;">Tier IV</span> | ||
| + | | style="position: relative;" | [[Bass Rape]]<br>[[File:Bass Rape.png|135px|link=]]<br><span style="position: absolute; bottom: 2px; left: 5px; font-size: 0.75em; font-weight: bold; color: #ffffff; background-color: #000000; padding: 1px 5px; border-radius: 3px; white-space: nowrap;">Tier VI</span> | ||
|} | |} | ||
| − | + | <br> | |
| − | + | <br> | |
| − | + | {| class="wikitable" style="text-align: center;" | |
| − | {| class="wikitable" | + | |+ [[Alien]]-exclusive weapons |
|- | |- | ||
| − | ! | + | ! Weapon type |
| − | ! | + | ! Stage 1 |
| − | ! | + | ! Stage 2 |
| − | + | ! Stage 3 | |
|- | |- | ||
| − | ! | + | ! Alien Sniper Rifles |
| − | + | | style="position: relative;" | [[HP DKS-501]]<br>[[File:S5-L.gif|link=]]<br><span style="position: absolute; bottom: 2px; left: 5px; font-size: 0.75em; font-weight: bold; color: #000000; background-color: #d8d8d8; padding: 1px 5px; border-radius: 3px; white-space: nowrap;">Tier II</span> | |
| − | | | + | | style="position: relative;" | [[SSR3]]<br>[[File:SSR3.png|link=]]<br><span style="position: absolute; bottom: 2px; left: 5px; font-size: 0.75em; font-weight: bold; color: #000000; background-color: #7094b1; padding: 1px 5px; border-radius: 3px; white-space: nowrap;">Tier III</span> |
| − | | | + | | style="position: relative;" | [[SSR10]]<br>[[File:SSR10.png|link=]]<br><span style="position: absolute; bottom: 2px; left: 5px; font-size: 0.75em; font-weight: bold; color: #000000; background-color: #82c471; padding: 1px 5px; border-radius: 3px; white-space: nowrap;">Tier IV</span> |
| − | |- | ||
| − | |||
| − | |||
| − | | | ||
| − | | | ||
|- | |- | ||
| − | ! | + | ! Alien Flamers |
| − | + | | style="position: relative;" | [[PyO61]]<br>[[File:PyO61.png|link=]]<br><span style="position: absolute; bottom: 2px; left: 5px; font-size: 0.75em; font-weight: bold; color: #000000; background-color: #d8d8d8; padding: 1px 5px; border-radius: 3px; white-space: nowrap;">Tier II</span> | |
| − | | | + | | style="position: relative;" | [[PyO62]]<br>[[File:PyO62.gif|link=]]<br><span style="position: absolute; bottom: 2px; left: 5px; font-size: 0.75em; font-weight: bold; color: #000000; background-color: #7094b1; padding: 1px 5px; border-radius: 3px; white-space: nowrap;">Tier III</span> |
| − | | | + | | style="position: relative;" | [[IPF210]]<br>[[File:PlasmaBlasterRifle.gif|link=]]<br><span style="position: absolute; bottom: 2px; left: 5px; font-size: 0.75em; font-weight: bold; color: #000000; background-color: #82c471; padding: 1px 5px; border-radius: 3px; white-space: nowrap;">Tier IV</span> |
|- | |- | ||
| − | ! | + | ! Alien Support Rifles |
| − | + | | style="position: relative;" | [[LAR42]]<br>[[File:LAR42.png|link=]]<br><span style="position: absolute; bottom: 2px; left: 5px; font-size: 0.75em; font-weight: bold; color: #000000; background-color: #d8d8d8; padding: 1px 5px; border-radius: 3px; white-space: nowrap;">Tier II</span> | |
| − | | | + | | style="position: relative;" | [[LAR52]]<br>[[File:LAR52.png|link=]]<br><span style="position: absolute; bottom: 2px; left: 5px; font-size: 0.75em; font-weight: bold; color: #000000; background-color: #7094b1; padding: 1px 5px; border-radius: 3px; white-space: nowrap;">Tier III</span> |
| − | | | + | | style="position: relative;" | [[LAR62]]<br>[[File:2 barrel laser.gif|link=]]<br><span style="position: absolute; bottom: 2px; left: 5px; font-size: 0.75em; font-weight: bold; color: #000000; background-color: #82c471; padding: 1px 5px; border-radius: 3px; white-space: nowrap;">Tier IV</span> |
|- | |- | ||
| − | ! | + | ! Alien Miniguns |
| − | + | | style="position: relative;" | [[ETG1000]]<br>[[File:ETG1000.png|link=]]<br><span style="position: absolute; bottom: 2px; left: 5px; font-size: 0.75em; font-weight: bold; color: #000000; background-color: #d8d8d8; padding: 1px 5px; border-radius: 3px; white-space: nowrap;">Tier II</span> | |
| − | | | + | | style="position: relative;" | [[ETG2000]]<br>[[File:ETG2000.png|link=]]<br><span style="position: absolute; bottom: 2px; left: 5px; font-size: 0.75em; font-weight: bold; color: #000000; background-color: #7094b1; padding: 1px 5px; border-radius: 3px; white-space: nowrap;">Tier III</span> |
| − | | | + | | style="position: relative;" | [[ETG3000]]<br>[[File:Teslagatling.gif|link=]]<br><span style="position: absolute; bottom: 2px; left: 5px; font-size: 0.75em; font-weight: bold; color: #000000; background-color: #82c471; padding: 1px 5px; border-radius: 3px; white-space: nowrap;">Tier IV</span> |
|- | |- | ||
| + | ! Alien Electric Weapons | ||
| + | | style="position: relative;" | [[XSR]]<br>[[File:XSR.png|link=]]<br><span style="position: absolute; bottom: 2px; left: 5px; font-size: 0.75em; font-weight: bold; color: #000000; background-color: #d8d8d8; padding: 1px 5px; border-radius: 3px; white-space: nowrap;">Tier II</span> | ||
| + | | style="position: relative;" | [[ESR01]]<br>[[File:ESR01.png|link=]]<br><span style="position: absolute; bottom: 2px; left: 5px; font-size: 0.75em; font-weight: bold; color: #000000; background-color: #7094b1; padding: 1px 5px; border-radius: 3px; white-space: nowrap;">Tier III</span> | ||
| + | | style="position: relative;" | [[ESR02]]<br>[[File:ESR02.png|link=]]<br><span style="position: absolute; bottom: 2px; left: 5px; font-size: 0.75em; font-weight: bold; color: #000000; background-color: #82c471; padding: 1px 5px; border-radius: 3px; white-space: nowrap;">Tier IV</span> | ||
|} | |} | ||
| − | == | + | == Extras == |
| − | + | ||
| − | * | + | In addition to weapons and armor, event participants can select one of the following "extras:" |
| − | * | + | *[[Wattz Motion Sensor]] added to your starting inventory |
| − | * | + | *[[RobCo Motion Sensor]] added to your starting inventory |
| − | * | + | *[[Stealth Boy|Stealth tools]] added to your inventory every time you respawn/refill your ammo and drugs |
| + | *One free capture point | ||
| + | *A bundle of five random items from the following list added to your character's stats for the duration of the event: | ||
| + | **+15 hit points or +5% critical damage (if you're below 150 HP) | ||
| + | **+1% DR | ||
| + | **+1 action point | ||
| + | **+1 SPECIAL point | ||
| + | **+6% more currency gained | ||
[[Category:Locations]] | [[Category:Locations]] | ||
Revision as of 03:15, 16 February 2026
War Event (WE) is a massive PVP event where players can join a lore faction in their fight for control of the Wasteland. Depending on the results of War Events, towns may change their allegiance changing the main Currency traders use and what patrols roam the neighboring area.
War Events happen every weekend and sometimes during week. It offers a more "arcade-ish" experience of FOnline3 in which you battle on the predefined arena, gain currency for helping your team win and spend it to upgrade your gear mid-combat. Participating in War Event results in reputation gains and special perk rewards, no matter if you win or lose.
Contents
How to Join
To Join War Event come to Black Cross Outpost with minimum level 24, its right from NCR. You do not need to take any gear with you, everything will be provided for you.
Walk to the gate in the North-Western part of the map, and interact with it. It will prompt you to choose the team you will fight for and what gear you want for the event. You can also choose your gear beforehand by pressing escape, going to 3rd page of config and configuring your gear for War Event. After the timer ends, you will hear a battle song and doors will open to your faction officer who will teleport you to the arena.

Notes
- Amount of currency you're getting from all sources scales with time:
- below 10 min = 10%
- 10-20 min = 20%
- 20-30 min = 30%
- 30-40 min = 50%
- 40-50 min = 100%
- 50-55 min = 300%
- 55-60 min = 400%
- If you lose the War Event, your reputation with the faction you were fighting for will decrease.
- Friendly fire kills transfer 25% of your currency to your teammate.
- KDA money multiplier now is KDA/2.
- NPCs gear depends on time: t1 in 0-10 min, t2 in 10-20, t3 in 20-40, t4 in 40-50, t5 in 50-55, t6 in 55-60.
- New Reno Wars Reputations can be spend during War Event:
- Unlock for the whole event: reroll weapon perks - 10 Bishop reputation.
- Unlock for the whole event: reroll armor perks - 10 Salvatore reputation.
- Unlock 25x buy exp for weapon - 10 Wrights reputation.
- Unlock 25x buy exp for armor - 10 Mordinos reputation.
- Teams get automatically balanced by pools of classes. Each class pool get balanced separately:
- Pool 1: Bounty Hunter, Sniper, Scout, Assassin, Cyborg (with Aggressive Implants)
- Pool 2: Super Mutant, Chosen One, Priest, Infantry, Cyborg (without Aggressive Implants)
- Pool 3: Soldier, Killer, Alien, Clone, Raider, Random Boy, Regulator (without Heavy Handed)
- Pool 4: Deathclaw, Combat Master, Regulator (with Heavy Handed)
- Pool 5: Wrecker
- Pool 6: Leader, Paramedic, Hubologist
WE Rules
[5B] Trolling on GM Events its forbidden
[5C] Team-killing on War Events its forbidden
[5D] Looting on War Events its forbidden
[5E] AFK War Event can cause 24h ban
[5F] Team up with other teams on Reno Wars or other events is forbidden
For all rules check Game Rules
Score
Personal Score:
- +33% score for win
- +750 score when paramedic revives
- +500 score for start taking flag
- +200 score for killing npc(-50 if friendly)
- +50 score per used super stimpak on teammate
- +1 score for applying radiation on enemies per 1 rad point (Rad rockets/Alien Rad Conversion)
- +30 score per each tick of taking flags
- +20 score per healing hit from healing needler
Team Score:
- Capture a neutral flag = +300 team points!
- Capture an enemy flag = steal 10% of their total points!
Team/Personal Score:
- Score for killing a player depending on killed player current score (KDA):
- if target has Less than 0.25: Personal: 25; Team: 20%;
- if target has 0.25 to 0.50: Personal: 35; Team: 30%;
- if target has 0.51 to 1.00: Personal: 50; Team: 60%;
- if target has 1.01 to 1.50: Personal: 75; Team: 75%
- if target has 1.51 to 2.00: Personal: 100; Team: 100%
- if target has 2.00 to 2.50: Personal: 125; Team: 110%;
- if target has 2.51 to 3.00: Personal: 150;Team: 120%;
- if target has 3.01 to 3.50: Personal: 175; Team: 130%;
- if target has 3.51 to 4.50: Personal: 200; Team: 140%;
- if target has 4.51 to 7.50: Personal: 250; Team: 150%;
- if target has 7.51 to 10.00: Personal: 500; Team: 175%;
- if target has above 10.00: Personal: 1000; Team: 200%;
KDA Multipliers
- KDA multiplier for players with no kills/assists:
0 Deaths = 3.0, 1 death = 2.8, 2 deaths = 2.5, 3 deaths = 2.1, 4 deaths = 1.6, 5 deaths = 1.0, 6 deaths = 0.75, 7 deaths = 0.50, 8 deaths = 0.25
- KDA multiplier for players with no deaths:
0 K/A = 3.0, 1 K/A = 3.3, 2 K/A = 3.7, 3 K/A = 4.2, 4 K/A = 4.8, 5 K/A = 5.5, 6 K/A = 6.3, 7 K/A = 7.2, 8 K/A = 8.2, 9 K/A = 9.3, 10 K/A = 10.5
War Event stats
War Event stats are itemized account-bound stat bonuses, similar to implants except they cannot be traded between players. They come in two tiers.
- T1 stats are given to all War Event participants.
- T2 stats have a 1% chance of dropping after a War Event but only if you have 10 T1 stats installed.
- Participating in New Reno Wars boosts your chance of receiving a T2 stat by 15% for 30 hours.
- If you already have a T2 stat installed, you cannot receive another one.
- A maximum of 10 T1 stats can be installed. You cannot install multiple copies of the same stat.
- Characters with Charisma ≥ 20 are allowed to exceed the limit and install one additional T1 stat.
- You can install one T2 stat, at the cost of three T1 stat slots.
- If your installed WE stats exceed the maximum, you can't attack and can be killed by a single hit. A dialog window will open allowing you to rectify the situation whenever you enter a new location.
| T1 Stat | Effects | T2 Stat | Effects |
|---|---|---|---|
| ST |
|
Melee Mastery (M.Mast) |
|
| MD |
| ||
| AS |
| ||
| PE |
|
Precision Marksman (P.Mark) |
|
| FOV | |||
| RNG |
| ||
| EN |
|
Versatile Support (V.Sup) |
|
| ULT |
| ||
| EXP |
| ||
| CH |
|
Cybernetic Enhancements (C.Enh) |
|
| IMP |
| ||
| SPE |
| ||
| INT |
|
Combat Medic (C.Med) |
|
| MED |
| ||
| DRG |
| ||
| AG |
|
Agile Sprinter (A.Spr) |
|
| ATB |
| ||
| AP | |||
| LK |
|
Lethal Precision (L.Prcn) |
|
| LD |
| ||
| LET |
| ||
| ACC |
|
Enhanced Firepower (E.Fire) |
|
| DRP |
| ||
| DMG |
| ||
| CC |
|
Critical Mastery (C.Mast) |
|
| CE |
| ||
| CP |
| ||
| HR |
|
Fortified Shield (F.Shd) |
|
| CR |
| ||
| SHD |
| ||
| DT |
|
Resilient Guardian (R.Grd) |
|
| DR |
| ||
| HP |
| ||
| SQ | Regenerative Boost (R.Bst) |
||
| APR |
| ||
| KS |
|
Armor progression
When you configure your event loadout, your choice of armor determines not only the armor and helmet you initially receive but also your entire armor upgrade path in all future events.
As you earn/buy gear XP during a War Event, your current armor levels up and once it reaches level 4, "give me a higher tier of my armor" dialog option appears when you initiate dialog with the respawn vendor that, at the cost of one capture point, allows you to advance to the next stage along your armor's upgrade path (see the table below).
The tier of your armor determines the tier of drugs that you receive from refills so it's generally a good idea to get your first upgrade as soon as possible.
| Stage 1 | Stage 2 | Stage 3 | Stage 4 | Stage 5 |
|---|---|---|---|---|
Leather Jacket Tier I |
|
Navy Armor Tier IV |
Stealth Armor Tier V |
Stealth Armor MKII Tier VI |
Leather Armor Tier I |
|
Navy Armor Tier IV |
Stealth Armor Tier V |
Stealth Armor MKII Tier VI |
Robe Tier I |
|
Navy Armor Tier IV |
Stealth Armor Tier V |
Stealth Armor MKII Tier VI |
Combat Robe Tier II |
Black Cross Robe Tier IV |
— | ||
Metal Armor Tier II |
|
Paladin Armor Tier IV |
Power Armor Tier V |
Hardened Power Armor Tier VI |
|
|
|
|
|


Weapon progression
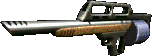
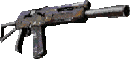
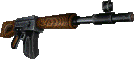
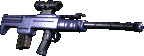
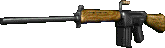
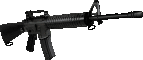
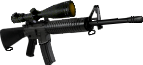
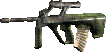
When you choose your starting weapon, you commit to its weapon type for the duration of the event so choose wisely. Like armor, weapons gain gear XP through combat, contesting flags, and direct gear XP purchases from the respawn vendor.
When your weapon reaches level 4, you're able to upgrade it to a higher tier at the cost of 1 capture point via the respawn vendor.
The tables below show every available starting weapon (except stackable throwing items that come in backpacks) and their upgrade paths.


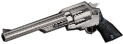
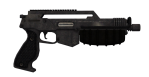
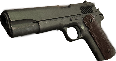

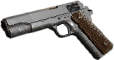


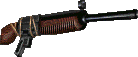
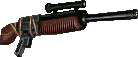

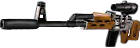
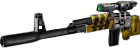
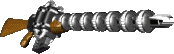
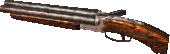
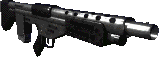
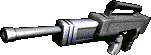

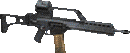
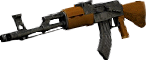


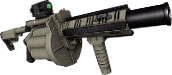
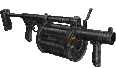

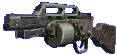


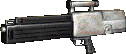
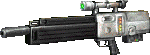
| Weapon type | Stage 1 | Stage 2 | Stage 3 | Stage 4 |
|---|---|---|---|---|
| Machine Guns | Lewis MKII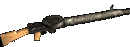 Tier II |
M60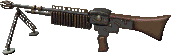 Tier III |
M240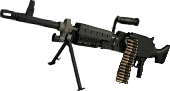 Tier IV |
Browning Auto Rifle Tier V |
| Flamers | Flamer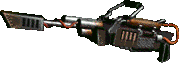 Tier II |
Improved Flamer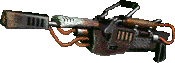 Tier III |
Incinerator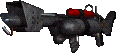 Tier IV |
Napalm Blaster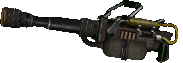 Tier V |
| Miniguns | Minigun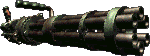 Tier II |
Avenger Minigun Tier III |
Vindicator Minigun Tier IV |
Gauss Minigun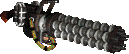 Tier V |
| Rocket Launchers | Rocket Launcher Tier II |
BigBazooka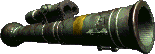 Tier III |
Adv. Rocket Launcher Tier IV |
Flash Launcher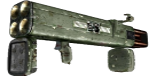 Tier V |
| Heavy Sniper Rifles | Heavy Rifle Tier II |
LSW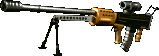 Tier III |
DSR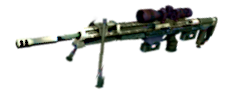 Tier IV |
Bozar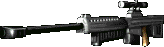 Tier V |
| Weapon type | Stage 1 | Stage 2 | Stage 3 | Stage 4 | Stage 5 | Stage 6 |
|---|---|---|---|---|---|---|
| Laser Weapons | Laser Pistol Tier I |
Magneto-Laser Pistol Tier II |
Laser Rifle Tier III |
Gatling Laser Tier IV |
Commissar's Pistol Tier V |
Turbolaser Tier VI |
| Plasma Weapons | Plasma Pistol Tier I |
Plasma Pistol MKII Tier II |
Plasma SMG Tier III |
Plasma Rifle Tier IV |
Turbo Plasma Rifle Tier V |
Plasma Gatling Tier VI |
| Fire Weapons | Signal Pistol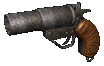 Tier I |
Solar Scorcher Tier II |
Fire Rifle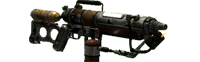 Tier III |
Alien Blaster Tier IV |
Pyro Rifle Tier V |
Heat Machine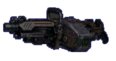 Tier VI |
| Electric Weapons | Electric Zip Gun Tier I |
Pulse Pistol Tier II |
ELECTRO Launcher Tier III |
Prototype 14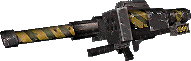 Tier IV |
Electro Cannon Tier V |
Pulse Rifle Tier VI |
| Weapon type | Stage 1 | Stage 2 | Stage 3 | Stage 4 |
|---|---|---|---|---|
| Clubs | Cattle Prod Tier II |
Super Cattle Prod Tier III |
Plasma Torch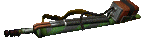 Tier IV |
Bass Rape Tier VI |
| Fast Knives | Shiv Tier II |
"Little Jesus" Tier III |
Machete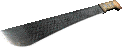 Tier IV |
Bass Rape Tier VI |
| Damage Knives | Combat Knife Tier II |
Wakizashi Blade Tier III |
Ripper Tier IV |
Bass Rape Tier VI |
| Punch Weapons |  Tier II  Tier II |
Mega Power Fist Tier III |
Punch Gun Tier IV |
Bass Rape Tier VI |
| Hammers | Sledgehammer Tier II |
 Tier III  Tier III |
Mega Sledge Tier IV |
Bass Rape Tier VI |
| Weapon type | Stage 1 | Stage 2 | Stage 3 |
|---|---|---|---|
| Alien Sniper Rifles | HP DKS-501 Tier II |
SSR3 Tier III |
SSR10 Tier IV |
| Alien Flamers | PyO61 Tier II |
PyO62 Tier III |
IPF210 Tier IV |
| Alien Support Rifles | LAR42 Tier II |
LAR52 Tier III |
LAR62 Tier IV |
| Alien Miniguns | ETG1000 Tier II |
ETG2000 Tier III |
ETG3000 Tier IV |
| Alien Electric Weapons | XSR Tier II |
ESR01 Tier III |
ESR02 Tier IV |
Extras
In addition to weapons and armor, event participants can select one of the following "extras:"
- Wattz Motion Sensor added to your starting inventory
- RobCo Motion Sensor added to your starting inventory
- Stealth tools added to your inventory every time you respawn/refill your ammo and drugs
- One free capture point
- A bundle of five random items from the following list added to your character's stats for the duration of the event:
- +15 hit points or +5% critical damage (if you're below 150 HP)
- +1% DR
- +1 action point
- +1 SPECIAL point
- +6% more currency gained
