War Event

War Event (WE) is a regularly scheduled large-scale PvP battle where participants, split into two competing teams, fight for control of the Wasteland on behalf of their assigned NPC factions.
War Event outcomes can shift the allegiance of the sites of these battles, impacting their economy and patrol encounters in their surrounding areas.
War Events take place every weekend, with an occasional one during the week. They offer a more streamlined, arcade-style experience compared to the main game: there's no grind required, you get your free gear and jump right into the fray, and when you die, you respawn nearly instantly with all of your items still in your inventory.
For a list of past and upcoming War Events, see the #warevents channel on FO3's official discord server.
All WE participants are guaranteed to receive a War Event stat; winners also gain reputation with the faction they fought for, while losers lose reputation with theirs.
To join a War Event, you must travel to the Black Cross Outpost (35:27), a mercenary base east of NCR. Do not bring any items; everything you need will be provided to you.
Once you've made it to the outpost, walk to the gate in the north‑western portion of the map and interact with it to enter the event lobby (available whenever there's a timer at the top of the screen counting down time before an upcoming War Event) or configure your event gear. You can make adjustments to your event gear presets at any time by pressing Escape, going to the third page of the settings menu, and clicking buttons on the "EVENT" panel.
Contents
WE rules
- Trolling (rule 5B), team killing (rule 5C), looting (rule 5D), AFKing (rule 5E; enforced automatically with a 24-hour ban after 7 warnings), and teaming up with opposing teams (rule 5F) are all explicitly forbidden during War Events.
- See #rules on FO3 discord for a full and up-to-date list of game/event rules.
Team balancing
Teams are balanced automatically at the start of the event based on the class perks of the participants.
Each class is assigned to a specific pool and the pools are then balanced separately:
- Pool 1: Bounty Hunter, Sniper, Scout, Assassin, Cyborg (with Aggressive Modules)
- Pool 2: Super Mutant, Chosen One, Priest, Infantry, Cyborg (without Aggressive Modules)
- Pool 3: Soldier, Killer, Alien, Clone, Raider, Random Boy, Regulator (without Heavy Handed)
- Pool 4: Deathclaw, Combat Master, Regulator (with Heavy Handed)
- Pool 5: Wrecker
- Pool 6: Leader, Paramedic, Hubologist
Currency gain and NPC gear scaling
- Your currency gains are multiplied by your KDA/2.
- Friendly fire kills instantly transfer 25% of any currency in your inventory to the teammate you killed.
- Currency gain rate goes up as the event draws to a close, allowing players to acquire better gear; NPC gear is similarly adjusted.
| Time remaining (in minutes) |
Currency multiplier |
NPC gear tier |
|---|---|---|
| 60:00 - 50:00 | 10% | Tier 1 |
| 50:00 - 40:00 | 20% | Tier 2 |
| 40:00 - 30:00 | 30% | Tier 3 |
| 30:00 - 20:00 | 50% | Tier 3 |
| 20:00 - 10:00 | 100% | Tier 4 |
| 10:00 - 05:00 | 300% | Tier 5 |
| 05:00 - 00:00 | 400% | Tier 6 |
Flags
War Event gameplay is centered around capturing and defending control points, represented by flags.
You left-click a flag to begin securing the control point. You must remain within the flag's range (shown when you mouse over it) for the entire duration of that process to contribute to it and earn capture points.
Your contribution towards the progress of an ongoing flag capture depends on your role.
| Role | Base | 901+ rep |
|---|---|---|
| Tanks | 0.4% | 0.2% |
| Semi-tanks | 0.6% | 0.3% |
| Utility | 1.0% | 0.5% |
| DPS | 1.5% | 0.7% |
| Snipers | 2.0% | 1.0% |
| Sneakers | 2.5% | 1.2% |
- Red/purple marker appears under a flag when your/enemy team starts contesting it.
- Each tick of flag capturing progress (while you are in its radius) grants +500 gear XP to your currently equipped weapon and armor.
- Successfully capturing a flag ranks up one random (slot 1, 2, or 3) gear perk of your currently equipped weapon/armor.
- The respawn vendor ("event officer") allows you to pick which flag you want to spawn on. You can normally choose any flag currently under your team's control but be aware that a flag that is actively being contested won't be available as a spawn point if the enemy team is more than 25% into their takeover.
- Entering the battlefield grants you temporary immunity unless you enter via a flag currently being contested in which case no immunity is given.
- The Mysterious Stranger perk synergy spawns two soldiers to fight alongside you whenever you re-enter the battlefield, if you have it. The effect has a 30-second cooldown.
Capture points
- For every 1% of flag capture progress, or for every tick towards that 1%, every player in range gains 0.01 capture points.
- Players who picked a free capture point as their extra start 1 capture point ahead of everyone else.
- The losing team gains 0.01 capture points every 5 seconds.
- Capture points can be used to purchase powerful, game-changing gear upgrades; use them wisely.
- By default, only three "premium options" are available but you can unlock more using reputation earned from participating in New Reno Wars.
| Premium option | Capture point cost (after unlocking) |
Unlocking cost (in NRW reputation) |
|---|---|---|
| Upgrade weapon tier (must be level 4+) | 1.00 | – |
| Upgrade armor tier (must be level 4+) | 1.00 | – |
| Tier IV ammo refill | 0.25 | – |
| 25 x weapon XP | 1.00 | 10 Wrights reputation |
| 25 x armor XP | 1.00 | 10 Mordinos reputation |
| Install an additional weapon perk | 1.00 | 25 Salvatores reputation |
| Install an additional armor perk | 1.00 | 25 Bishops reputation |
| Reroll weapon perks | 1.00 | 10 Salvatores reputation |
| Reroll armor perks | 1.00 | 10 Bishops reputation |
| Upgrade your weapon's item luck (+1) | 1.00 | 25 Mordinos reputation |
| Upgrade your armor's item luck (+1) | 1.00 | 25 Wrights reputation |
Scoring system
During the event, you can earn points for yourself and your team. The team with the most points wins the event and reaps the rewards. The player with the most points wins the prestige of being the player with the most points. Individual score is capped at 250,000 plus 5% (12,500 points) for every flag captured by the player.
You can increase your and your team's score by killing your opponents and completing objectives; see the table below for details.
| Kill-based score | Objective/teamplay-based score | ||||||||||||||||||||||||||||||||||||||||||||||||||||||||||||||||||||||||||||||||||||||
|---|---|---|---|---|---|---|---|---|---|---|---|---|---|---|---|---|---|---|---|---|---|---|---|---|---|---|---|---|---|---|---|---|---|---|---|---|---|---|---|---|---|---|---|---|---|---|---|---|---|---|---|---|---|---|---|---|---|---|---|---|---|---|---|---|---|---|---|---|---|---|---|---|---|---|---|---|---|---|---|---|---|---|---|---|---|---|---|
|
When you kill an enemy player, the score earned from that kill is determined by the victim's KDA. The higher their KDA, the more points they provide, see the table to the left. Normally, a player's KDA ratio is simply However, two edge cases require special handling: a player who has zero deaths meaning their KDA cannot be calculated by division, and a player with no kills/assists, whose KDA would always equal 0, which might not accurately represent their impact on the match, especially early on in the event when everyone is at 0/0/0.
As you can see from the table to the left, the team score is a multiplier. That multiplier is used in the following formula:
Team-controlled flags include every single flag on the map (excluding only Leader flags) that bears your team's colors. |
| |||||||||||||||||||||||||||||||||||||||||||||||||||||||||||||||||||||||||||||||||||||
At the conclusion of the event, everyone's personal score is modified using their class-specific multiplier (see the table below) and the final results are displayed via the message box.
| Score multiplier |
Classes |
|---|---|
| 60% | Assassin, Scout |
| 70% | Bounty Hunter, Combat Master, Clone, Cyborg, Hubologist, Killer, Raider, Random Boy, Soldier, Wrecker |
| 90% | Alien, Deathclaw, Sniper |
| 100% | Chosen One, Regulator, Super Mutant |
| 150% | Infantry, Leader, Paramedic, Priest |
Comeback stats
If your team is behind, you gain temporary bonus stats at the rate of 1 stat for every 250 points the winning team is ahead of you.
These bonuses persist until the event ends. You can choose to start the event with 5 of them already active, see the Extras section below.
War Event stats

War Event stats are itemized account-bound stat bonuses, similar to implants except they cannot be traded between players. They come in two tiers.
- T1 stats are given to all War Event participants.
- T2 stats have a 1% chance of dropping after a War Event but only if you have 10 T1 stats installed.
- Participating in New Reno Wars boosts your chance of receiving a T2 stat by 15% for 30 hours.
- If you already have a T2 stat installed, you cannot receive another one.
- A maximum of 10 T1 stats can be installed. You cannot install multiple copies of the same stat.
- Characters with Charisma ≥ 20 are allowed to exceed the limit and install one additional T1 stat.
- You can install one T2 stat, at the cost of three T1 stat slots.
- If your installed WE stats exceed the maximum, you can't attack and can be killed by a single hit. A dialog window will open allowing you to rectify the situation whenever you enter a new location.
| T1 Stat | Effects | T2 Stat | Effects |
|---|---|---|---|
| ST |
|
Melee Mastery (S.HTH) |
|
| MD |
| ||
| AS |
| ||
| PE |
|
Precision Marksman (S.RNG) |
|
| FOV | |||
| RNG |
| ||
| EN |
|
Versatile Support (S.ULT) |
|
| ULT |
| ||
| EXP |
| ||
| CH |
|
Cybernetic Enhancements (S.IMP) |
|
| IMP |
| ||
| SPE |
| ||
| INT |
|
Combat Medic (S.MED) |
|
| MED |
| ||
| DRG |
| ||
| AG |
|
Agile Sprinter (S.MOV) |
|
| ATB |
| ||
| AP | |||
| LK |
|
Lethal Precision (S.LET) |
|
| LD |
| ||
| LET |
| ||
| ACC |
|
Enhanced Firepower (S.DMG) |
|
| DRP |
| ||
| DMG |
| ||
| CC |
|
Critical Mastery (S.CRT) |
|
| CE |
| ||
| CP |
| ||
| HR |
|
Fortified Shield (S.SHD) |
|
| CR |
| ||
| SHD |
| ||
| DT |
|
Resilient Guardian (S.DEF) |
|
| DR |
| ||
| HP |
| ||
| SQ | Regenerative Boost (S.REG) |
||
| APR |
| ||
| KS |
|
Armor progression
When you configure your event loadout, your choice of armor determines not only the armor and helmet you initially receive but also your entire armor upgrade path in all future events. You can only purchase up to two additional suits of body armor from the respawn vendor but you can reroll your helmet as many times as you want.
As you earn/buy gear XP during a War Event, your current armor levels up and once it reaches level 4, "give me a higher tier of my armor" dialog option appears when you initiate dialog with the respawn vendor that, at the cost of one capture point, allows you to advance to the next stage along your armor's upgrade path (see the table below).
For information on the amount of gear XP required to level up specific armor types, see Armor perks#Armor experience.
The tier of your armor determines the tier of drugs that you receive from refills so it's generally a good idea to get your first upgrade as soon as possible.
| Stage 1 | Stage 2 | Stage 3 | Stage 4 | Stage 5 |
|---|---|---|---|---|
|
|
|
|
|
|
|
| ||
|
|
| ||
|
|
|
|
|
|
|
| ||
|
|
| ||
|
|
|
|
|
|
|
| ||
|
|
| ||
|
|
|
|
|
|
|
|
|
|
|
|
|
|
|


Weapon progression
When you choose your starting weapon, you commit to its weapon type for the duration of the event so choose wisely. Like armor, weapons gain gear XP through combat, contesting flags, and direct gear XP purchases from the respawn vendor. You can purchase up to two additional weapons from the respawn vendor.
When your weapon reaches level 4, you're able to upgrade it to a higher tier at the cost of 1 capture point via the respawn vendor.
For information on the amount of gear XP required to level up specific weapon types, see Weapon perks#Weapon experience.
The tables below show every available starting weapon (except stackable throwing items that come in backpacks) and their upgrade paths.


| Weapon type | Stage 1 | Stage 2 | Stage 3 | Stage 4 |
|---|---|---|---|---|
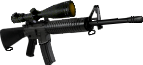
| Machine Guns | Lewis MKII Tier II |
M60 Tier III |
M240 Tier IV |
Browning Auto Rifle Tier V |
| Flamers | Flamer Tier II |
Improved Flamer Tier III |
Incinerator Tier IV |
Napalm Blaster Tier V |
| Miniguns | Minigun Tier II |
Avenger Minigun Tier III |
Vindicator Minigun Tier IV |
Gauss Minigun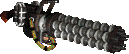 Tier V |
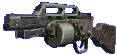
| Rocket Launchers | Rocket Launcher Tier II |
BigBazooka Tier III |
Adv. Rocket Launcher Tier IV |
Flash Launcher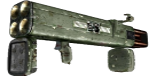 Tier V |
| Heavy Sniper Rifles | Heavy Rifle Tier II |
LSW Tier III |
DSR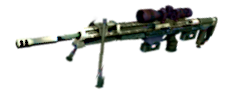 Tier IV |
Bozar Tier V |
| Weapon type | Stage 1 | Stage 2 | Stage 3 | Stage 4 | Stage 5 | Stage 6 |
|---|---|---|---|---|---|---|
| Laser Weapons | Laser Pistol Tier I |
Magneto-Laser Pistol Tier II |
Laser Rifle Tier III |
Gatling Laser Tier IV |
Commissar's Pistol Tier V |
Turbolaser Tier VI |
| Plasma Weapons | Plasma Pistol Tier I |
Plasma Pistol MKII Tier II |
Plasma SMG Tier III |
Plasma Rifle Tier IV |
Turbo Plasma Rifle Tier V |
Plasma Gatling Tier VI |
| Fire Weapons | Signal Pistol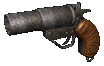 Tier I |
Solar Scorcher Tier II |
Fire Rifle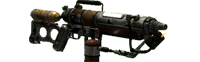 Tier III |
Alien Blaster Tier IV |
Pyro Rifle Tier V |
Heat Machine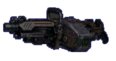 Tier VI |
| Electric Weapons | Electric Zip Gun Tier I |
Pulse Pistol Tier II |
ELECTRO Launcher Tier III |
Prototype 14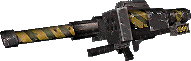 Tier IV |
Electro Cannon Tier V |
Pulse Rifle Tier VI |
| Weapon type | Stage 1 | Stage 2 | Stage 3 | Stage 4 |
|---|---|---|---|---|
| Clubs | Cattle Prod Tier II |
Super Cattle Prod Tier III |
Plasma Torch Tier IV |
Bass Rape Tier VI |
| Fast Knives | Shiv Tier II |
"Little Jesus" Tier III |
Machete Tier IV |
Bass Rape Tier VI |
| Damage Knives | Combat Knife Tier II |
Wakizashi Blade Tier III |
Ripper Tier IV |
Bass Rape Tier VI |
| Punch Weapons |  Tier II  Tier II |
Mega Power Fist Tier III |
Punch Gun Tier IV |
Bass Rape Tier VI |
| Hammers | Sledgehammer Tier II |
 Tier III  Tier III |
Mega Sledge Tier IV |
Bass Rape Tier VI |
| Weapon type | Stage 1 | Stage 2 | Stage 3 |
|---|---|---|---|
| Alien Sniper Rifles | HP DKS-501 Tier II |
SSR3 Tier III |
SSR10 Tier IV |
| Alien Flamers | PyO61 Tier II |
PyO62 Tier III |
IPF210 Tier IV |
| Alien Support Rifles | LAR42 Tier II |
LAR52 Tier III |
LAR62 Tier IV |
| Alien Miniguns | ETG1000 Tier II |
ETG2000 Tier III |
ETG3000 Tier IV |
| Alien Electric Weapons | XSR Tier II |
ESR01 Tier III |
ESR02 Tier IV |
Extras
In addition to weapons and armor, event participants can select one of the following "extras:"
- Wattz Motion Sensor added to your starting inventory
- RobCo Motion Sensor added to your starting inventory
- Stealth tools added to your inventory every time you respawn/refill your ammo and drugs
- One free capture point
- A bundle of five random "comeback stats" from the following list added to your character's base stats for the duration of the event right at the start:
- +15 hit points or +5% critical damage (if you're below 150 HP)
- +1% DR
- +1 action point
- +1 SPECIAL point
- +6% more currency gained
Notes
- Participating in three War Events within 48 hours grants an additional reward (the timer resets after each event).
- Latecomers are able to join the event 5 to 20 minutes after it starts. They will always be placed on the losing team.
- Item dropping/trading is disabled on all WE maps, including the lobby.
- Your carry weight capacity will be multiplied by 100 for the duration of the event.
- You can use the
~showteamcommand to toggle the display of a persistent list of all of your teammates and their stats at the top of your screen. - Turret Mechanics receive 10 Good Metal Parts with every ammo/drug refill.
- New Reno family items (Bishop MG, Mordino Taser, etc.) are not available during War Events.